If you’re used to having a bidet at home, when you’re at sea it can feel like something’s just missing.
You may be thinking that it’s an impossible job, installing a bidet on your boat. Especially if you have a fancy electric bidet seat at home with all the bells and whistles.
But fear not, there are options for every boat, budget and DIY competence level. Even a few non-installation options.
In this article I outline 6 options for installing a bidet on your boat. I’ve also drawn up some detailed DIY instructions for most boats and pipes.
Why install a bidet on a boat?
For much of the world (apart from America) bidets are standard. They’re more hygienic than toilet paper and are better for the environment.
Bidets also have advantages specifically for boat use:
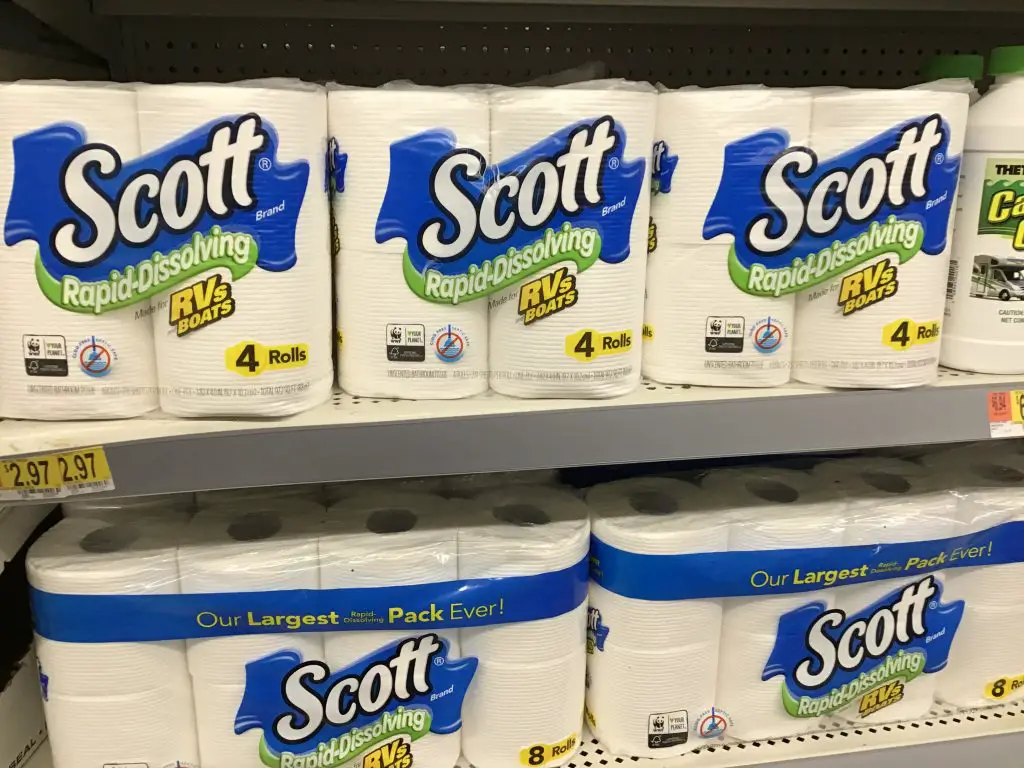
- They get rid of the need to store toilet paper on board, which means more room for the important stuff (snacks and beer).
- No need to worry about clogs. Unclogging the head is by far the worst job on a boat. YUK.
- Water is kinder to your behind than scratchy 1-ply marine toilet paper, especially if you suffer from sensitivity.
As the saying goes… Once you use a bidet, there’s no going back.
I’m not joking when I say it’s life-changing.
Bidets for boats
It might seem like an impossible task to install a bidet on a boat – but it’s really not.
There are several different options to pick from and some don’t require any installation at all!
So what are your options?
Here are six unique ways to install a bidet on a boat.
- Install a bum gun
- Install a bidet attachment
- Install an electric bidet
- Bring a portable bidet aboard (no installation)
- Use a camping bidet (no installation)
- Use a garden sprayer (minimal installation)
I go through each method below and explain the pros and cons.
Install a bum gun (hand-held bidet)

The simplest and most popular option is to install a bum gun, otherwise known as a handheld bidet.
Bum guns are very similar to a kitchen sink sprayer.
The only difference is where you keep them.
Bum guns are popular because:
- They’re easy to install (I explain how later)
- You can use them for other things such as rinsing your feet or cleaning dirty clothes
- They’re small so can fit in a confined space
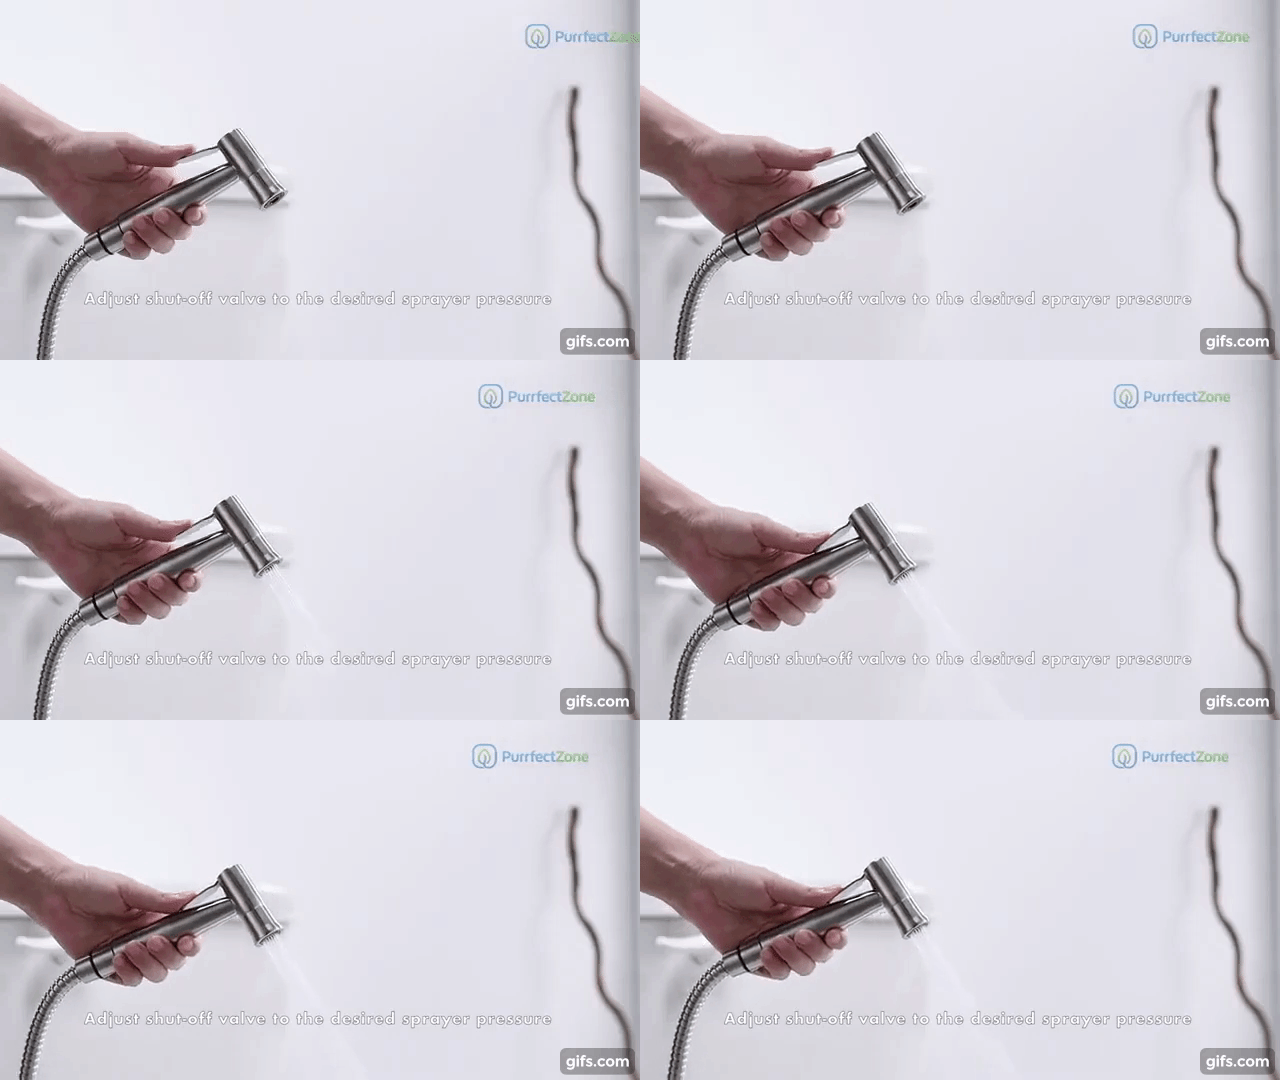
To use a bum gun, take the spray head, aim it at the appropriate place and press down on the handle.
This’ll release a stream of water which you can use to clean yourself.
How hard you press the handle determines the pressure.
One downside of a bum gun is that it can be hard to aim, especially for newbies. Although this will sort itself out after a few uses.
A great bum gun for boats is the PurrfectZone Sprayer.
It has two spray modes: a soft flow mode that’s perfect for females and a jet spray mode (for the messier days).
Although the main selling point for me is the extended hose (sold separately).
If I’m going to go through the trouble of installing this thing, I want it to be able to reach all across my bathroom so I can use it at every opportunity. A short hose simply won’t do.
Once you’ve installed it, ‘don’t worry, we can use the bum gun!’ can become your default answer for everything.
Split beer all down yourself? Don’t worry, we can use the bum gun!
To install a bum gun you need to connect the bidet hose to the water pipe that feeds your sink via a T-adapter.
Sounds easy right? It is, I promise.
You can see the full instructions below.
If you like the sound of a handheld sprayer but can’t be bothered to install it (I feel you), a great substitute is a handheld showerhead.
If your shower head can reach your head (or you don’t mind stepping into the shower), job done.
Install a bidet attachment

A bidet attachment removes the need for you to do the dirty work of aiming the bidet. Instead, the spray wands sit inside your toilet bowl already perfectly aimed.
The spray wands only extend when you’re using the bidet, and not so far that they’ll be in any danger of touching the toilet water.
When you’re not using the bidet, the wands retract and sit behind a guard gate.
The downside of this is that you can’t use the bidet for anything other than its intended purpose (and it doesn’t have a cool name like the bum gun does).
The attachment fits between your toilet and the seat. And you’ll need a little bit of space on the right-hand side of your head to allow for the controls.
Typically bidet attachments stick out about 3-4 inches (you can reduce this by being selective with your choice of attachment)
The attachments come with either one or two spray wands. Being a woman, I much prefer the two wand options because one is a dedicated feminine sprayer.
When there’s just one spray wand, it’s aimed at the behind.
The best bidet attachment for boats is the Brondell Thinline SimpleSpa. (in my opinion).
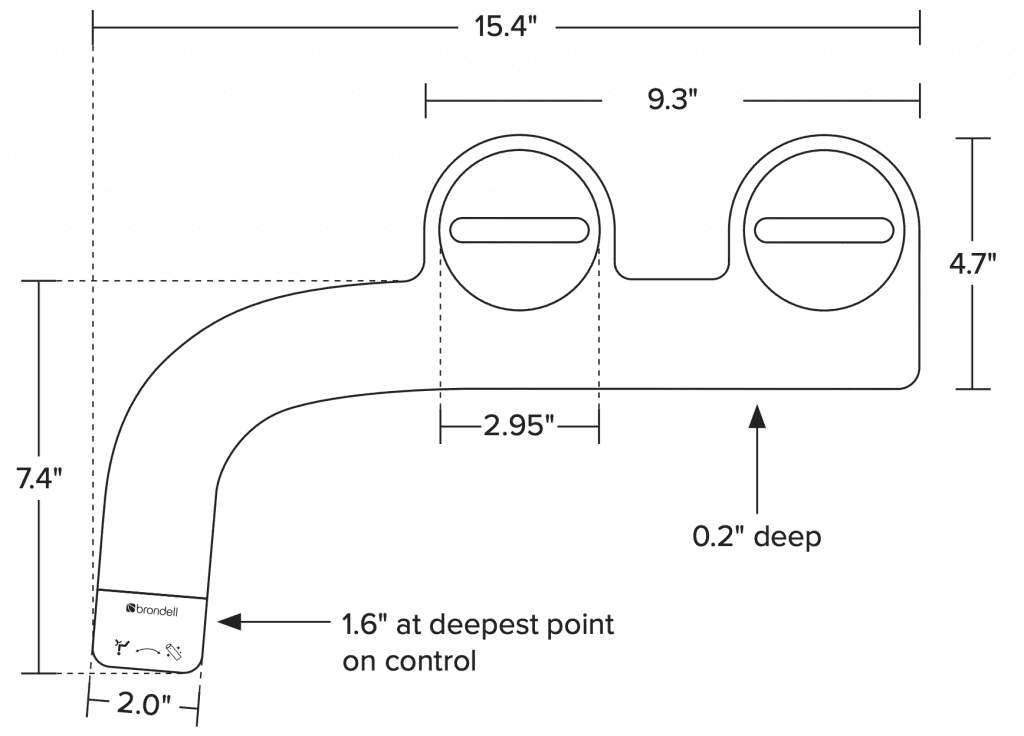
It comes with dual nozzles, adjustable pressure, and is super compact. The bidet measures just 15.4” across in total compared to the standard 17”.
When you have a small bathroom, every inch counts.
It’s also only 0.2” thick, which means it won’t create an annoying gap between your toilet seat and the bowl.
You install it in much the same way as a bum gun, by attaching the bidet pipe to the water pipe under your sink. I explain this in much more detail here.
The Luxe bidet range is also great if size isn’t an issue for you.
Electric bidet (for DIY experts only)

I’ve purposely left the electric bidet until last because it’s the most tricky option to install.
Only the most dedicated bidet fans are likely to want to try.
You need a source of electricity near the head (most bidets require 120 volts) as well as a compatible toilet.
Electric bidet seats replace your standard toilet seat, so you need to make sure the measurements match up. The closer in size your head is to a standard toilet, the more chance there is of a bidet fitting.
Always look for a round-sized bidet as these are smaller than the elongated versions.
Electric bidets come with either a remote control, or an attached side panel. I recommend picking one with a remote, because side panels take up and extra 3-4 inches of space.
If you manage to tick off all these requirements then you can install the bidet in much the same way as the attachment – inserting a T-adapter into the sink connection.
Once you’ve got it working you’ll be able to enjoy luxuries such as a heated seat, a warm water stream, and an air deodorizer that filters the air around the head.
It’s like having a spa in your bathroom. The epitome of boat luxury!
I’ve seen BioBidets installed on boats so it’s definitely possible, and they’re a great brand. The BioBidet-2000 (pictured above) is a top-of-the-range bidet and comes with a nightlight, warm water, and a self-sterilizing wand.
No installation boat bidets
Sometimes things are best left alone.
No tools, no extra fittings or piping to buy and no potential damages or complications to your prized boat.
No worrying about what a potential buyer might think of your modifications.
Sound good to you?
Then a no-installation bidet is the ideal solution for keeping clean down below when you’re out at sea.
Portable bidet (or travel bidet)
Portable bidets are a no-installation option that come ready-to-use.
By nature of being portable, they’re small and will take up ZERO room in your bathroom.
However, because they’re small, the spray they produce is relatively weak.
Portable bidets come in two main types: manual and electric.
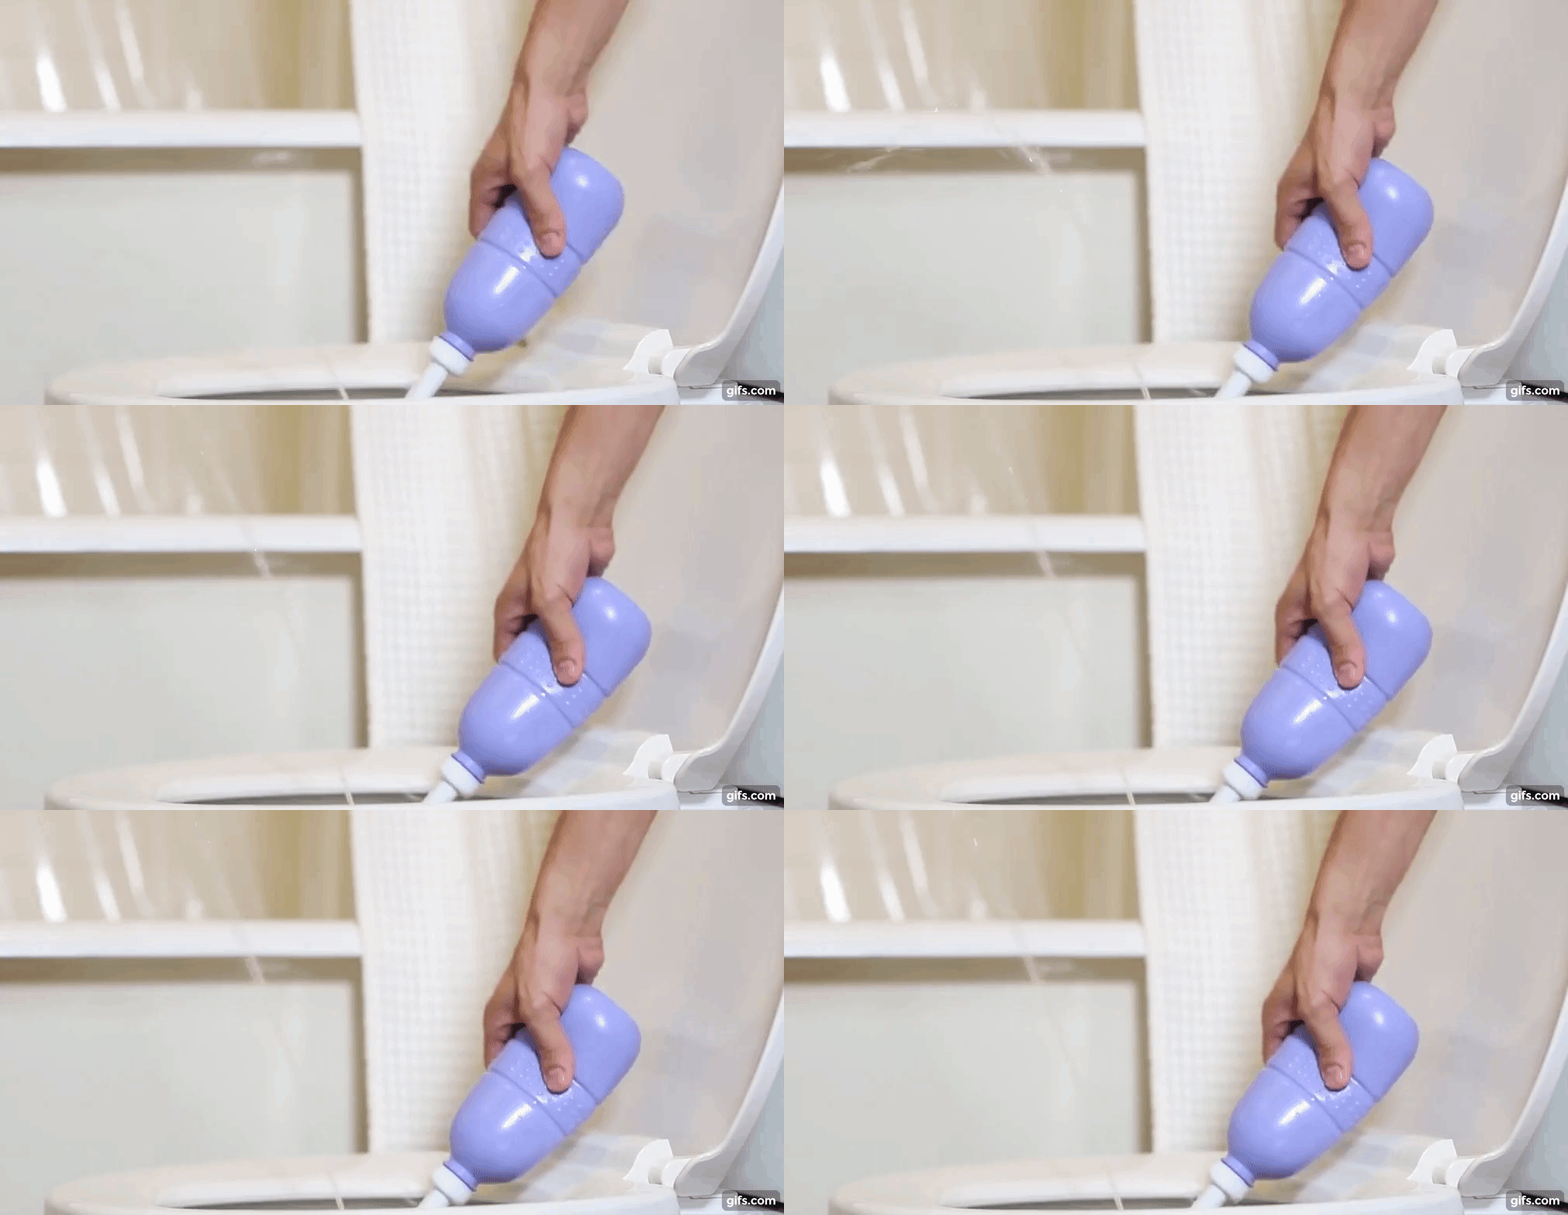
Manual portable bidets (like the Brondell Spa) are simply a squeezy bottle with a long, angled spout for a lid. You fill them with water and then squeeze the bottle to create the water stream.

You operate the electric versions (like the TOTO Travel Washlet) by filling them up and then pressing a button to release the water stream.
Electric travel bidets have a slightly stronger water stream than their manual cousins. But the electric bidets tend to have less capacity so can hold less water.
Both types can fit in a day bag, so you can take them on your land adventures too!
The perfect companion – it never has to leave your side. And you never have to worry about toilet paper again.
I use the Electric Toto Travel Washlet (pictured above) because it has the largest capacity of any electric bidet at 180ml. The average is around 140ml.
This means you never need to worry about it running out and having to refill it halfway through cleaning yourself up.
Rechargeable portable bum gun

I really like this option.
It combines the power and strength of a bum gun, with the portable nature of a squeeze bottle.
Amazing!
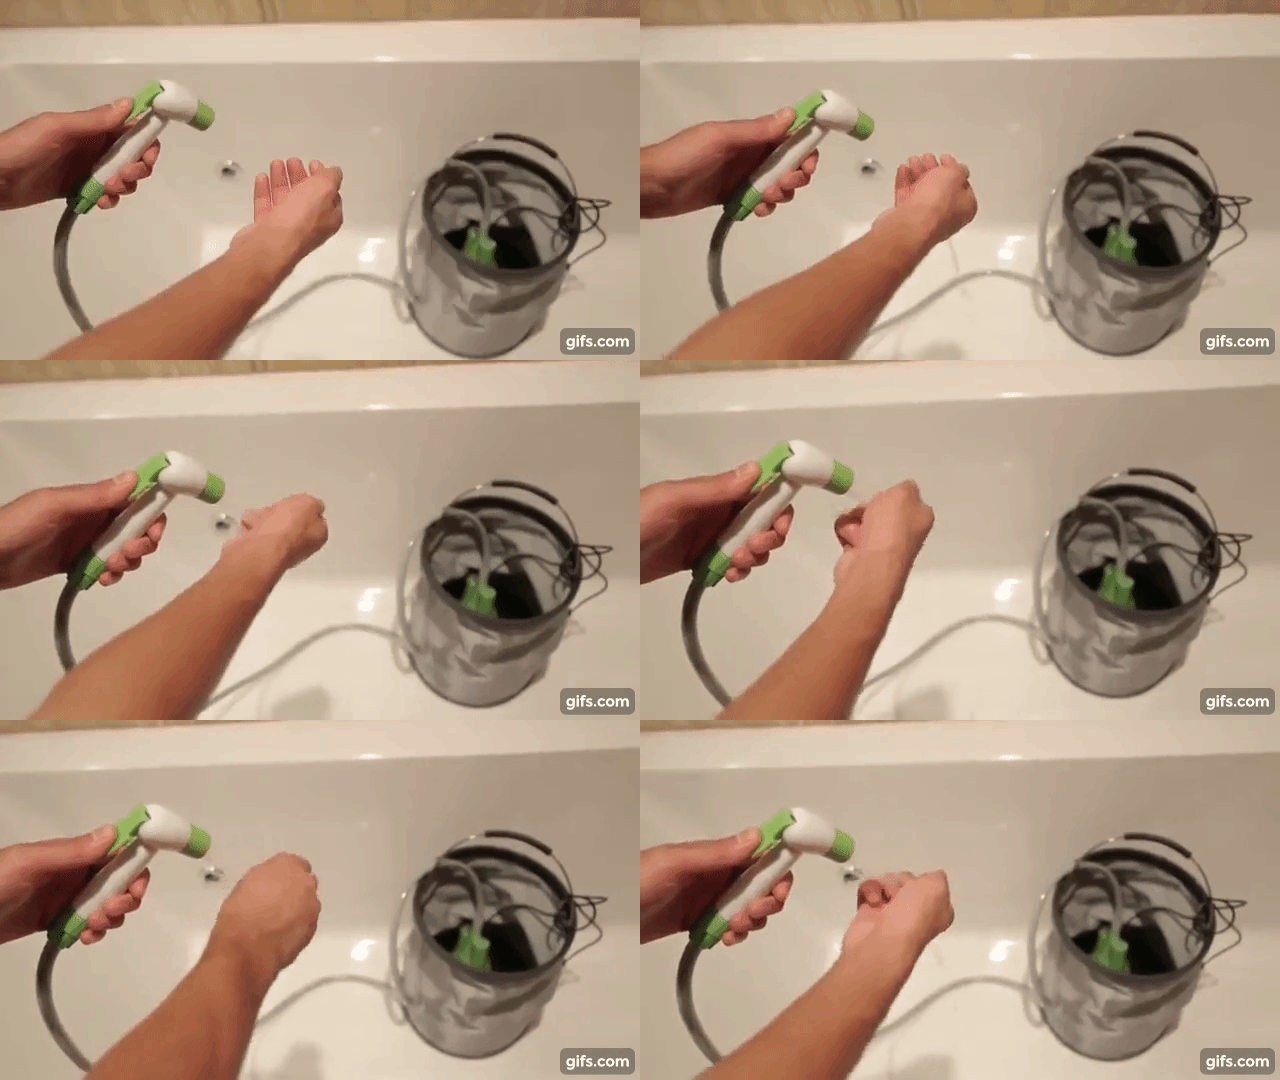
The setup requires only two things:
- A rechargeable bidet hose (like this one from My PortaWash)
- A bucket (or a sink)
To use a portable bum gun, you fill a bucket up with water (whatever temperature you want), put the end of the bidet hose in the water, and then use the sprayer just as you would a plumbed bum gun.
If your sink is close enough (with a 6 ft hose it probably will be) you can use the sink instead of a bucket.
The My PortaWash Bidet comes with a suction holder so you can attach it to the wall and make it semi-permanent.
But you also have the option to take it with you anywhere on the boat, it’s not confined to the bathroom!
It’s also great for leaving on the deck while you swim so you can rinse off as soon as you get out.
Paired with a collapsible bucket that folds away for easy storage, the bidet is perfect for somewhere with very little space.
To charge it you simply connect it to your phone or laptop via a USB connection. You can charge it anywhere (even in the middle of the ocean).
Garden sprayer (minimal installation option)

If you’re slightly confused by this option I get it.
How would a garden sprayer (like this one from Itsill) be useful in the bathroom?
When you strip a bidet back to basics, it’s a device that sprays pressurized water. Coincidently, this is exactly how you’d describe a garden sprayer!
You can use the garden sprayer as it is, but the handles tend to be very long and not angled enough which makes them awkward to position.
Or you can choose to use the garden sprayer as a feeder for a handheld bidet or bidet attachment rather than a water pipe.
How to make a garden sprayer bidet:
- Remove the garden sprayer handle
- Fit the garden sprayer tube and the bidet tubing together (you may need a reducer for this, or you might be lucky and one will fit in the other and you can secure them with a clamp)
- Fill the garden sprayer with water and test the bidet. Check for any leaks
- Tighten any fittings that leaked and voila! You’re ready to go
To increase the pressure you need to pump the garden hose a few times. But be careful not to pressurize the tank too much because the pressure can get VERY strong.
So strong you can also use it for blasting dirt of your boat.
Since you’re filling the tank up yourself, you can also pick the water temperature. Plus, you can easily keep an eye on how much water you’re going through.
This will really help ease your mind if you’re concerned about the bidet using up too much water.
How to install a bidet on a boat
Okay, now for the bit you’ve been waiting for.
The overarching message I want to get across is this:
You need to splice your water pipe, add in a T-adapter and then turn that T-adapter into a suitable connection for the bidet hose.
Once you’re done, you can simply screw the bidet hose onto your new T-adapter.
The water can then flow through the pipes and into the bidet.
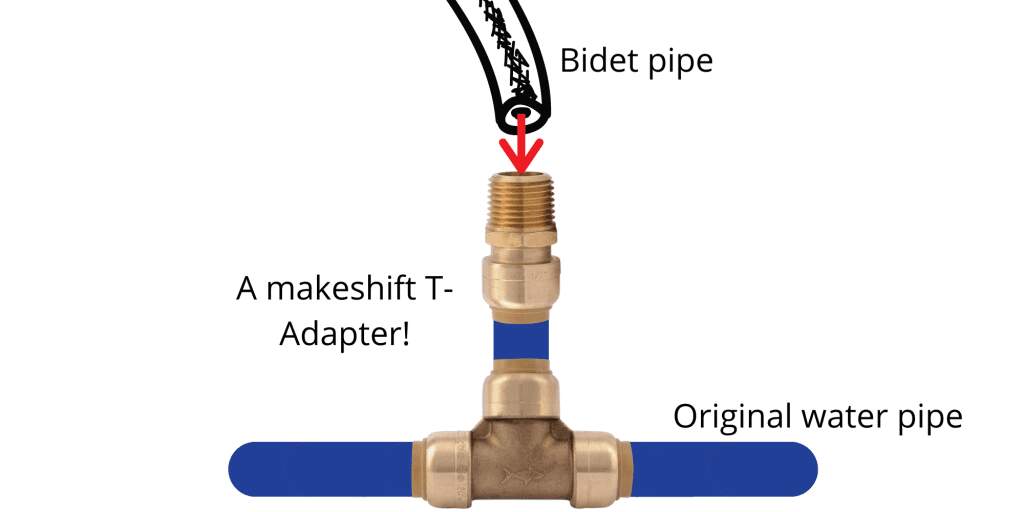
Before you start, remind yourself what kind of tubing your boat uses and its sizing.
Familiarize yourself with the connection the bidet needs too.
The exact equipment and connections you’ll need will differ depending on your plumbing e.g. PEX tubing requires different connectors to reinforced flexible pipes.
The below instructions should cover most plumbing systems.
And if they don’t cover yours exactly, hopefully they’ll at least get you on the right track.
If you need any help figuring out what adapters and connections you need, try your local hardware store – they should be able to help!
Equipment
- A bidet (I recommend the Purrfect zone sprayer with an extended hose)
- T-connector (SharkBite push-to-connect 1/2″ T-connector)
- Extra tubing (1/2″ PEX tubing)
- A male connection that fits the female end of your bidet (1/2″ PEX to 1/2″ NPT/male thread adapter)
- Hose clamps and crimper (optional)
*The recommended products assume you have 1/2″ PEX tubing in your boat. If you don’t you need different parts but the method stays the same.
Method
Step 1: Turn the water pressure off
Turn the water pressure off and bleed any excess water.
Otherwise, when you cut the water pipe you’ll get a nasty surprise!
Step 2: Mark and cut the water pipe
Mark the water pipe that supplies your sink where you want to cut it. This is where the T-connecter will go.
If you’re not sure where to mark it, place your bidet where it’s going to live and trail the hose over to the pipe. Where they meet is where you should mark.
If the hose doesn’t reach, don’t worry, you can fix this in step 4.
Cut the water pipe as cleanly as possible. Use proper pipe cutters to get the best cut.
Step 3: Fit a T-adapter in between the spliced pipe
Fit a T-adapter in-between the cut pipe.
With PEX, a SharkBite push-to-connect T-connector is a life-saver.
Push-to-connect connections are great because they don’t require any crimping. Just push them on and you’re set.
(SharkBite also do PEX crimp connections if you prefer)
For most marine systems, you’ll need a ½ inch size T-adapter (linked above). But they come in a variety of sizes.
Sadly SharkBite push-to-connect connections don’t yet have a big selection that will work with traditional reinforced piping.
Hopefully this will change. But for now, if you have flexible piping, you have several options:
- Use a standard ½” hose barb tee and then secure the connections with a crimper and hose clamps.
- Convert each end of your flexible piping to PEX using an adapter (e.g a ½” PVC to ½” PEX adapter) or with threads (you’ll need a 1/2″ hose barb to 1/2″ NPT/male thread and a 1/2″ PEX to 1/2″ FNPT/female thread). Then use a SharkBite T-connecter to join the new PEX tubes together.
Step 4: Prepare the extra tubing and attach it to the T-connection
The extra tubing serves two purposes:
- To make it easier to convert the T-adapter into a male thread
- To increase the length of your bidet hose
Cut your extra tubing to the length you want and attach it to the loose end of the T-adapter
I’d suggest leaving it quite long so your bidet sprayer has a big range of movement. The more you can move it around the bathroom, the more things you can use it for.
But don’t leave the pipe so long that it’s trailing all over the floor.
If you don’t need to extend the length of your bidet hose, you can look for a T-adapter that has a male thread as the third connection and skip to step 7.
Step 6: Add a connection to the extra tubing that the bidet hose can fit onto
Now you need to examine your bidet hose and see what connection it needs.

Most bidets (including the one I recommend), have a ½ inch female thread at the end of the hose and screw into a ½” NPT/male thread.
Therefore, you need to transform the end of your tubing into a ½” male screw adapter.
- With PEX tubing you need to get a PEX ½” tubing to ½” NPT/male thread adapter
- With reinforced tubing, you can use a ½” hose barb to ½” NPT/male thread adapter.
Once you’ve attached this connection, you’ve effectively created an extended T-adapter and the bidet can screw right on.
Note: if you have a plastic bidet hose you can opt to take a slightly different approach.
Another option for plastic bidet hoses
First, cut the end of the bidet hose so it’s just another piece of tubing.
Then you need to attach the loose bidet hose to the extra tubing you put in the T-adapter (or just put it straight on the T-adapter if it fits and the hose is long enough).
All you need for this is a pipe connector.
Make sure to get one that fits both tube sizes.
You may need a reducer if the bidet hose is smaller than the extra tubing you used. For example, if your bidet hose is ⅜” in diameters but your extra tubing is ½” in diameter you need a ½” to ⅜” reducer.
If they’re both a ½” in diameter, you need a 1/2″ to 1/2″ connector. Shark bite actually does a 1/2″ push-to-connect PVC connector if you’re interested to try the mechanism but don’t have PEX.
Step 7: Attach the bidet hose
Finally, you can attach the bidet hose and test the connections for any leaks.
If there are no leaks, it’s time to relax!
How much water does a boat bidet use?
The average home user will use about 1/8th of a gallon per use.
But note that this is an estimate for a home user, where water is infinite.
When you’re on a boat, you’ll naturally be a LOT more conservative and therefore use significantly less. Things like the pressure you pick will influence water usage.
I would time how long you’re using the bidet to fully wash you. Then repeat this but into a measuring jug so you can see exactly how much you’re using. If you think it’s too much then you can try using a lower pressure or not spraying for as long.
Water usage will be far less of a worry if you have an onboard watermaker. If you don’t have one, they’re a great investment.
How to dry off after using a bidet
The question on everyone’s lips.
If I’m no longer storing toilet paper on my boat – how do I dry myself off?!
I personally air dry. With a little shake, it only takes a couple of seconds to feel sufficiently dry.
Other options include taking a little bit of toilet paper to use. You should only need 1-2 sheets to dry yourself off, so a few rolls will go a long way.

Or you can get some reusable toilet paper and use that to dab yourself dry.
Whenever I suggest the towel option I always get the same reaction: *screws up face in disgust*.
But when you think about it, it’s just like drying yourself off after showering. And no one thinks that’s gross.
Water is really efficient at cleaning you. There shouldn’t be any debris left, so you don’t need to worry about getting the towel dirty.
Should I use fresh or raw water with the bidet?
I know freshwater is limited on a boat, but I would always opt for a freshwater bidet if I had the choice.
Raw water can be irritating and can make any sensitivities worse. The salt in raw water has a very pronounced drying effect on skin and if you’re using it to wash your bum this can have unintended effects.
