A leaking bidet is far from ideal, but luckily most of the potential issues have quick fixes.
It can seem scary, fixing a bidet with limited plumbing knowledge.
But trust me – you CAN do it. Most fixes are quick and easy and require minimal equipment.
In this article, I go through all the possible issues that can cause a bidet to leak (I’m looking at you, dodgy T adaptor).
I explain how to identify the problem, and (most importantly) how to fix it.
So, how do you fix a leaking bidet T adaptor? To fix a leaking bidet T adaptor, turn off the mains water supply and flush the toilet. Check the T connecter for any dislodged or damaged washers. Next, ensure the leak isn’t caused by a crossed thread or improperly tightened connection. Replace any damaged parts and re-test for any leaks.
Remember: before attempting to fix any leak, turn your water supply off and flush the toilet until the tank is empty.
How to fix a leaking t-adapter on a bidet (or other connection)
The T-adapter is the most likely place for a bidet installation to leak.
But note that the issues I describe here can be applied to any connection on your bidet, not just the t-adapter connections.
Several different things could be causing the connection to leak. These include:
- If a washer is missing, incorrectly fitted, or damaged
- If the connection is cross-threaded
- If the connections aren’t tight enough
- If the connections are overtightened
To troubleshoot the problem, it’s best to check for every possible issue before deciding on a suitable course of action.
For example, if you decide your connection is too loose but you’ve also missed the washer, tightening alone isn’t going to fix the problem.
Examine the entire leaking connection, checking for the washer and damaged threads first to eliminate these as issues before proceeding with a fix.
A washer issue
An issue with the washer is the most likely problem and the first thing you should check.
The fittings to secure your bidet are what’s known as compression fittings.
Compression fittings seal using a washer (also referred to as an o-ring or a gasket) to create the watertight seal.
If the washers aren’t properly installed it can cause a leak. The washer could be:
- Missing
- Upside down or not sitting straight
- Cracked/broken
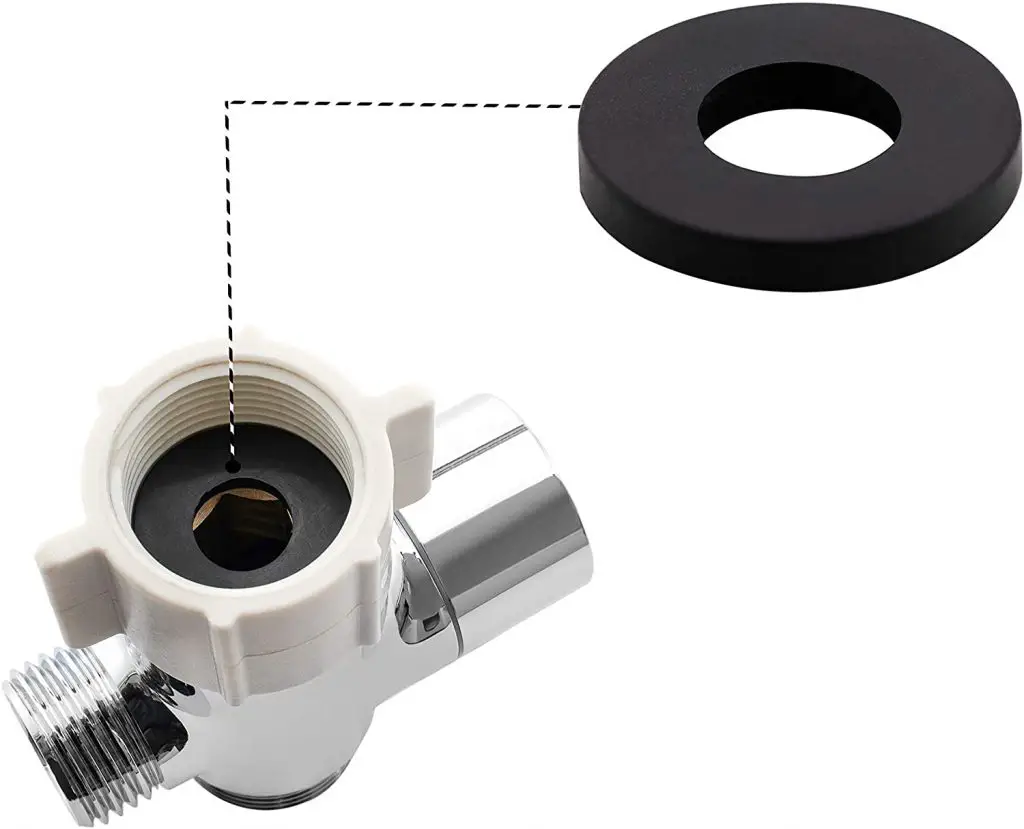
You need to fit a washer in the top of the t-adapter (the bit where it connects to the toilet bowl), and in both ends of the bidet hose.
To troubleshoot a problematic washer:
- Unscrew the leaking connection
- Check to see if the washer is there
- Check to see if the washer is positioned correctly
- Check the quality of the washer and inspect it for damage
Missing washer
Any fitting that requires a washer will come with one, but it may not be in place or it may have fallen out during shipping.
When you spot a leak, unscrew the connection and check for a small black ring (rubber or fiber).
If you can’t see it, you’ve found the problem.
Have a look around the toilet and inside the packaging to see if you can find it and place it inside the fitting.
Screw the fitting back up and check that there are no more leaks.
Upside down or ill-fitting washer
Another common mistake is fitting the washer upside down (it’s easy to do).
The flat side of the washer should be seated first.
If it’s not, flip the washer around and screw the connection back up. Turn on the water and see if there’s still a leak.
Upside down washers aren’t the only potential positioning problem.
If the washer is slanted, or the wrong size, this can also cause problems.
The washer should be the right size if you got it with the bidet, but if you’re using one purchased separately there’s a chance it’s not. In this case, I’d take the connection to the hardware store and ask them what size you should be using.
When there’s not a lot of room to install the bidet, or if you have a tight water line, it can cause the t-connection to become slanted which can lead to a slanted washer and a leak.
I detail how to fix this here.
Cracked/broken washer
If you see the washer and it’s positioned correctly, take it out and examine it for cracks or deformities.
Deformities in the washer can create holes where water can leak out. Over time, washers can become damaged and worn out so may need replacing.
If you spot any cracks, you’ll need to replace the washer.
You can get a new one from any DIY store, but make sure you get the right size. I would take the t-adapter with you so you can be sure you get the correct size the first time around.
The connection is cross-threaded or you’ve stripped the threads
If the washer seems fine, the next thing to check is the threads.
Cross threading means to screw together two threaded connections without correctly aligning the threads.
This can cut the threads and mean the fitting will tighten before it seals properly (resulting in a leak).
Cross threading usually occurs when you’re trying to screw the connection together at an angle (or if there’s dirt/debris in the thread).
Mismatched thread sizes can also cause an issue.
Stripped threads is another word for threads that have been damaged beyond repair. Stripped threads are no longer capable of holding a connection.
You can strip a thread by cross-threading it, or by using excessive force.
It’s way too easy to cross-thread plastic and metal mixed threads, which are common in bidet installations.
How to tell if my threads are crossed?
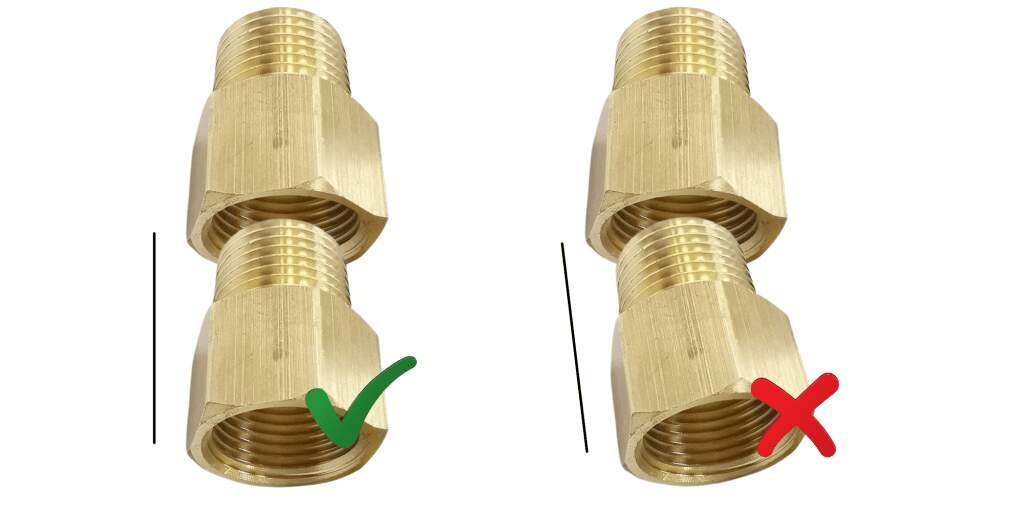
There are a few ways to spot crossed threads:
- If the connection looks crooked, you’ve likely crossed the threads
- You should be able to turn the screws for 3-4 full turns before it gets hard, if the screws become hard to turn before that, this indicates crossed threads
- Visually inspect the threads, if they look mangled or cut, they’ve been crossed
How do you fix crossed threads?
Depending on how much force has been used on the crossed threads, they may or may not be damaged beyond repair.
If they don’t look damaged, try re-threading the connection making sure to keep the screws straight. This should fix the problem.
Some people will recommend you use Teflon tape here, but you shouldn’t need to if the threads are in-tact. I explain in more detail why you shouldn’t use Teflon in a later section.
If the threads look damaged, you’ll need to replace them.
You can restore damaged threads, but it’s hard and not worth it when replacement parts are so cheap.
If you’ve damaged the threads protruding from the toilet, these are part of the fill valve. You’ll need to replace the whole part to get new threads (don’t worry it’s not hard).
How to prevent cross-threading:
Once you’ve un-crossed your threads, the last thing you want is for it to happen again.
Here’s a super simple trick to make sure you never cross-threads again.
- Put the threads together as if you were going to screw them up
- Turn the screw the WRONG way while applying a small amount of upwards pressure
- When you feel the threads ‘click’ into place (it’s hard to describe, but you’ll know what I mean when you feel it), this is when you can start tightening the threads
If you find cross-threading a persistent issue, then it might be worth you investing in a cross-threading resistant Tee. GenieBidet sells a t-adapter with a plastic threaded neck.
The inside screw is plastic rather than metal. This massively reduces the chance of cross-threading because you’re joining plastic to plastic instead of metal to plastic.
The connection is too loose
If the washer and the threads are fine, then the problem could be as simple as the connection being too loose.
Imagine the fittings are goldilocks.
Goldilocks needed her porridge to be just right, not too hot or too cold.
The ‘tightness’ of your connections also needs to be just right. If it’s too loose OR too tight, the connection can leak.
The general rule for bidets is that you should hand tighten the connection as much as possible, then leave it.
Finger tight is all right.
How to tell if a connection is too loose?
If there’s still some give in the threads and you can tighten them, they’re likely too loose.
In this situation, you simply need to tighten the fittings and the leak should stop.
Most people should be fine with hand-tightening.
But I’m a self-confessed weakling and sometimes struggle to tighten things up fully. If you can relate to this, then it might be worth using a wrench (or asking someone stronger to help you).
Tighten the fitting as much as you can, then turn it ⅛ of a turn with the wrench. Check for leaks. If there’s a leak, turn it ⅛ more and check again. Repeat this until there’s no leak.
GO SLOW.
You want to avoid over-tightening the screws (you’ll see why in the next section). Checking for leaks often means it’s easy to hit the sweet spot and avoid over-tightening territory.
The connections are overtightened
It makes sense you should tighten the connections much as possible, even if it means forcing it, right?
Wrong.
But don’t worry. You’re not alone.
Overtightening is very common, especially if you’re a newbie to plumbing.
Most people don’t realize it’s a bad idea until they notice a leak and google it.
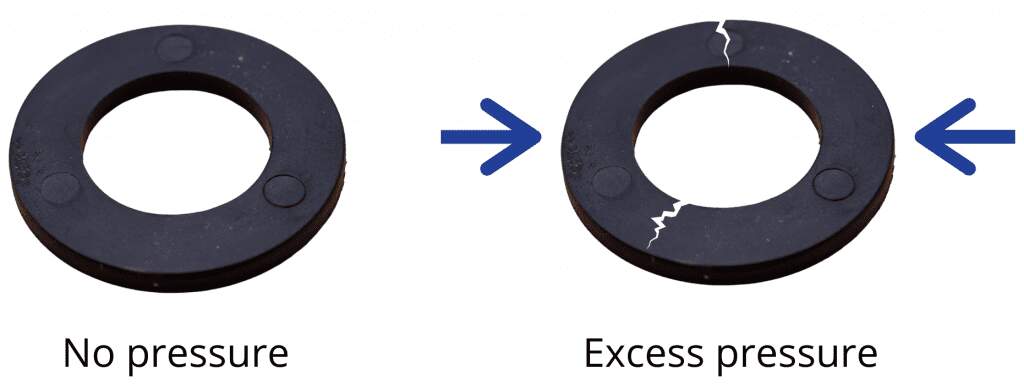
Overtightened connections can cause leaks for two reasons:
- It puts a lot of pressure on the surrounding parts like the washers. The excess pressure can push the washer out of position, or warp the washer and lead to cracks or gaps appearing through which water can leak
- Forcing a connection to tighten when it doesn’t want to can ruin the threads (cross threading)
If you’re finding it really difficult to get the connection off, then it’s likely you’ve overtightened it.
Using a wrench without stopping every so often to check for leaks is another common cause of over-tightening. Most bidet connections only require hand tightening.
To fix an overtightened connection:
- Loosen the connection (you might need to use a wrench)
- Check for signs of damaged threads. If you see any, skip to the crossed threads section
- Screw the connection back up by hand until it becomes hard to turn, then test for leaks
- If it leaks, tighten it ⅛ of a turn more and test again
- Keep turning it ⅛ of a turn each time until it stops leaking
By going slowly you’re making sure you stop tightening as soon as it becomes tight enough.
If you find the leaking doesn’t stop after following these steps, the washer may be irreparably damaged from overtightening. In this case, you’ll need to replace the washer.
A pressurized water supply line
This one is a less common issue, but I have seen it occur.
If none of the above sorts your issue, an over-pressurized water line could be the cause.
If you’ve had to twist your water supply pipe and force it into a position where it fits your new t-adapter, an over-pressurized pipe could be your problem.
If the water pipe has tight bends in it (and just generally isn’t happy in its position) it could be putting unnecessary pressure on the point where it joins the t-adapter. This excess pressure can force cross-threading, or cause the washer to slip out of position. Both of which can cause leaks.
To fix this issue, you need to get a longer (flexible) pipe and swap it out for the struggling supply line.
A longer pipe might seem counterintuitive if you only have a small space, but it can allow you to have less tight bends and release some of the pressure on the t-adapter.
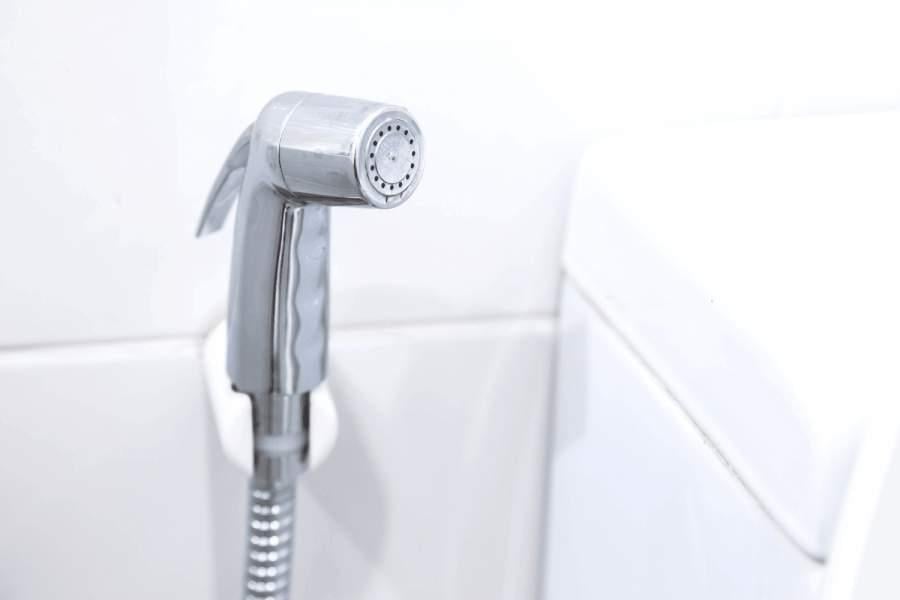
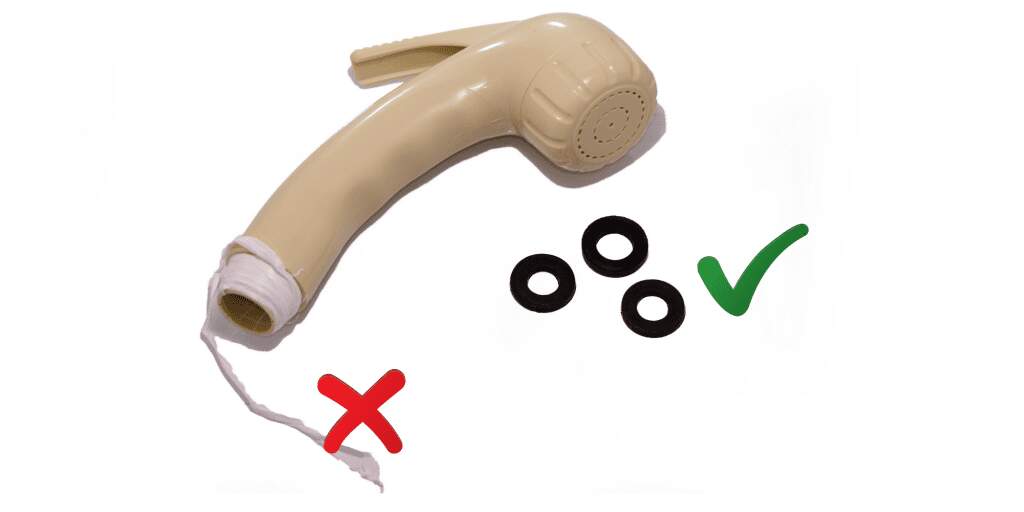
How to fix a leaking hand-held bidet head
Hand-held bidets are one of the most popular types.
They can leak at the t-adapter just like any bidet, but another common leak is out of the spray head.
A leak from the head can be particularly annoying because it means the water will spray EVERYWHERE instead of just at your bum.
The most likely problem here is that something has gone wrong with the washer.
If it’s a brand new bidet, the washer might be missing or defective. If you’ve had it a while and the leak has just started, the washer has probably worn out.
To troubleshoot a leaking bidet sprayer head:
- Turn the water supply off
- Unscrew the bidet head and check for the washer. If it’s not there, you need to fit one.
- If you can see the washer, take it out and replace it with a new one
- Re-screw the bidet sprayer head and turn the water on
- Test the bidet for leaks
If adding/replacing the washer doesn’t work, it’s likely you have a defective head and you’ll need to get a replacement.
If the bidet is new you should be able to contact the manufacturer and get a free replacement sent out.
How to fix a leaking bidet hose
The bidet hose can leak from the actual hose itself, or from the connections to the bidet or the t-adapter.
Broken hose
It’s pretty easy to diagnose when your bidet hose is broken.
To fix a hose leaking due to a cut or hole, the best thing to do is get a replacement hose.
You could try patching it up with duct tape, but it’s only a matter of time before the duct tape fails too.
It’s better to bite the bullet and fix it properly the first time.
Leaking connection
If the hose is leaking at one of the joints (rather than from the hose itself) you need to unscrew the connections and take a look at what’s going on.
It’s possible the connections are too loose, or that they’ve been tightened too much, or that there is an issue with the washer(s).
I explain how to check for and fix all these issues in the T-Adapter Leaking Section.
How to fix leaking nozzles in a bidet seat
This can happen in bidet seats.
The most likely problem is that you haven’t properly secured the seat in its mounting bracket.
Check the seat is correctly mounted and locked in place. You should hear a click when you secure it.
On most electric bidets there’s a ‘release’ button that you can use to quickly remove the seat from the toilet. When you press this button, it drains the bidet of any water that’s held inside.
If the seat isn’t properly secured in its mounting brackets, this button can be permanently pressed. This means your bidet will be continually draining itself causing a leak.
If you find that you can’t fully secure the seat because the back of the toilet is in the way, you can adjust the brackets and move them forwards.
If you try this and it doesn’t work, or you can’t see a release button, you could be one of the unlucky few who has been sent a defective seat (this is pretty rare). Contact the manufacturer, explain that you’ve tried to fix it and it hasn’t worked so you’d like a new unit.
Do you need Teflon tape when installing a bidet?
When you’re researching a leaking bidet, a LOT of sources will mention Teflon tape, and some may even recommend using it as a way to fix your leak.
Don’t listen to them. They’re giving you bad advice.
You shouldn’t need to use any Teflon tape when you’re installing a bidet.
Teflon tape is used to seal connections where the actual threads create the seal. In a bidet, a washer makes the seal, not the threads. In fact, using Teflon tape on bidet fittings can interfere with the fitting and cause a leak.
Teflon tape is used a lot in plumbing so it’s easy to see a leak and think ‘oh Teflon tape will fix it’.
But Teflon tape has no inherent sealing properties. Adding it to a compression fitting won’t prevent leaks, and it won’t fix leaks either.
It will just add bulk to the fitting.
And if you use too much Teflon tape, you bulk the screw up so much that you prevent the connection from screwing down far enough to seal properly. The threads will become tight before they’ve reached the washer.
An improperly sealed connection = a leaking connection.
Also, if some tape gets stuck within the sealing mechanism, this can create an imperfect seal and also lead to a leak.