Bokashi is the new kid on the block in composting and is certainly causing a few waves. It’s been around since the early 1980s, but many people are still discovering it.
Whether you’re a die-hard outdoor heap composter or just starting to research your different options, you can probably benefit from bokashi in some way.
I’ve put together the ultimate guide to bokashi. I go through everything from how to do it to bokashi troubleshooting and how bokashi compares to traditional composting.
What is Bokashi?
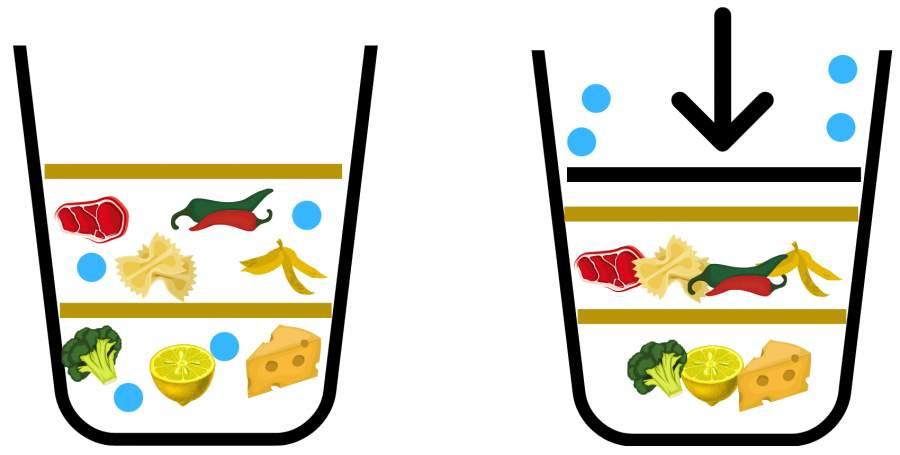
Bokashi is a process that turns food waste into a nutrient-rich soil amendment. It differs from composting because the food waste is fermented in an anaerobic environment rather than decomposed aerobically.
In simple terms, mix your food waste with the specialized bokashi bacteria (bokashi bran) and then leave it in an airtight container to ferment for around two weeks. After those two weeks, you have what’s known as bokashi pre-compost.
The pre-compost is too acidic to be used on plants straight away, so it needs to be buried away for a further two weeks to neutralize. Once the mixture is neutralized, you’ll have a soil amendment with similar uses to compost.
Bokashi is becoming more and more popular as composting is moving into more urban areas. Bokashi is more suitable for urban composting, apartment composting, or balcony composting than traditional methods because it’s quick, odorless, and space-efficient.
What is bokashi bran?
Bokashi bran is referred to by several different names, including bokashi inoculant, effective microbes (EM), and bokashi powder. The bran contains the microbes that work to ferment the food waste. Without it, the food waste would rot and get very smelly.
There are four main ingredients in bokashi inoculant:
- The essential microbes
- Water
- Sugar
- Bran (or some other dry medium)
Microbes are living things and need water to survive. That’s why the inoculant contains water. Sugar is food for microbes and is usually in the form of molasses. You can think of the bran as a house for the microbes or something for them to live on.
You can make your own bokashi bran at home by buying all the ingredients separately, mixing them, and letting them sit for 2-3 weeks. Check out the video below to see a great DIY example.
The downside to homemade bokashi bran is you can never be sure of the quality of the final product. And in my experience, batches can fail for no apparent reason. I prefer to buy my bokashi bran ready-made because it’s less hassle.
The ready-made stuff comes dried, so the microbes are dormant, allowing the bran to be stored. When you mix the dried bran with your food scraps, the moisture will rehydrate it and activate the microbes.
How To Bokashi Compost
Bokashi fermentation is a simple process with only a few steps. From start to finish, the bokashi process takes 4-6 weeks, but only 1-2 days of that requires work.
Here are the four steps you need to follow for successful bokashi.
1. Fill your bokashi bin with food waste, making sure the bokashi bran is well mixed throughout
You can throw all your food scraps into the bokashi bin, including things you can’t usually compost like meat, dairy, and bones. With bokashi, absolutely nothing goes to waste.
The only things to avoid are lots of liquid, which can drown the microbes, and excessive oil/grease.
Collect your scraps in a kitchen compost bin and transfer them to the bokashi bin every one or two days. I prefer to fill my bin every two days because this minimizes the air I expose to my bokashi mix.
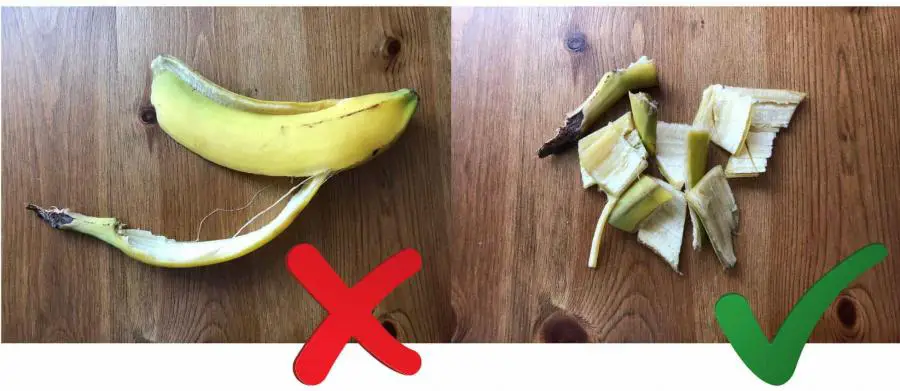
Make sure to chop everything up relatively small before you put it in the bokashi bin. ½ – 1-inch chunks are ideal. The smaller the pieces, the quicker they’ll be processed.
After you’ve put the food waste in, you need to add the magic ingredient, the bokashi bran.
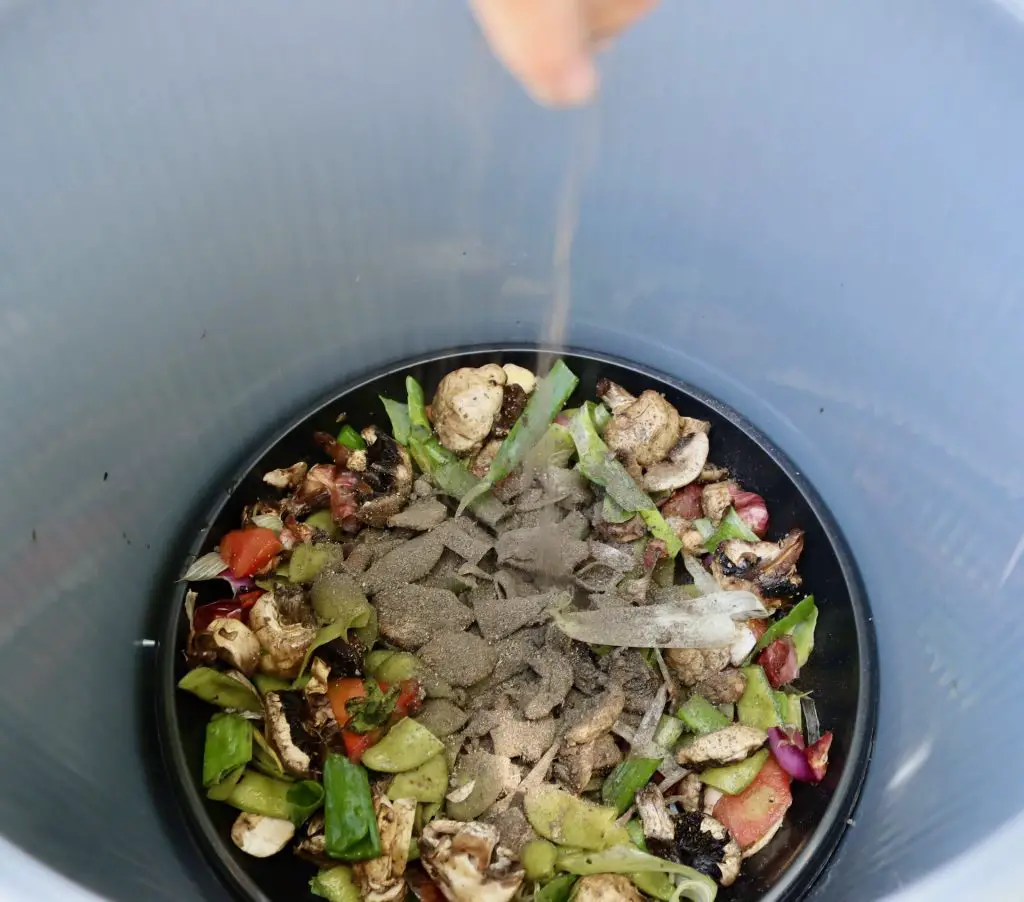
You can either mix the food waste with the bokashi bran before you put it in the bin so everything is evenly coated, or add a coating of the bran after each layer of food waste
1-2 tablespoons of bran for every 2 inches of food is a good ratio. The harder you process foods (e.g., meat), the more bran you should put in.
If in doubt, add more bran. It’s better to have a little bit too much than not have enough.
Before closing the bin, you must do everything you can to get rid of the air.
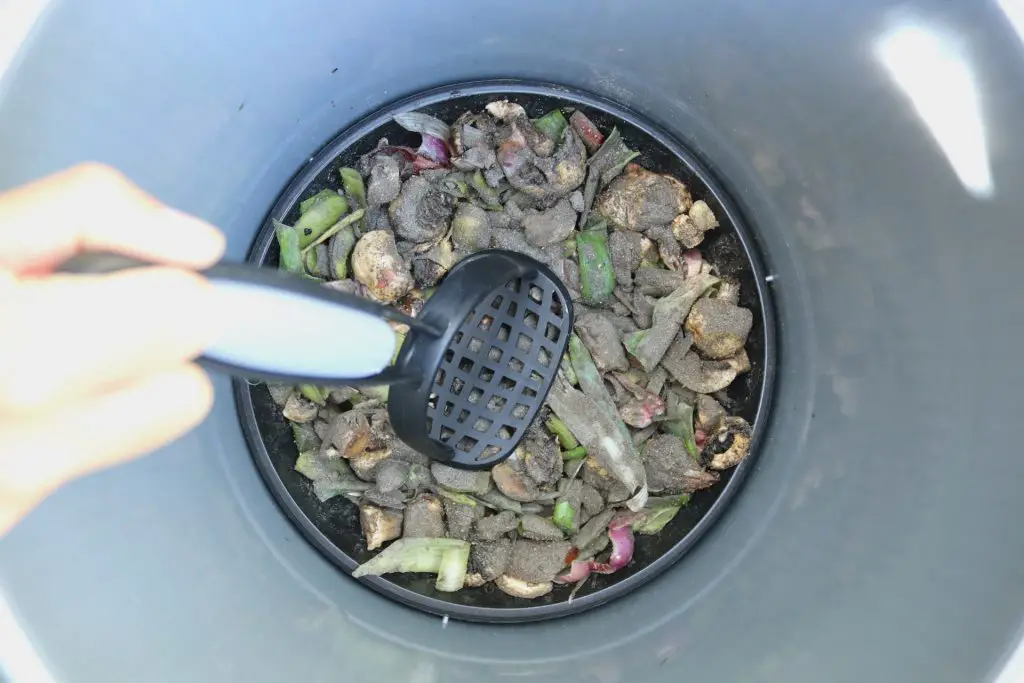
Get a potato masher and press down on your mixture to minimize air holes. Some bokashi bins have their own tool for doing this, but I prefer to use my potato mashed because it can cover more area.
As the bin gets more full, pressing it down with a potato masher also helps to squeeze the liquid out of the bottom layers and stop it from getting too soggy. If the bottom layers are left to sit in liquid, they can start to rot instead of ferment.
2. Cover the waste to seal out the air
After you’ve put your first lot of waste in, the bin won’t be full and the surface of your waste will be exposed to a lot of air, even after you put the lid on.
Your waste needs to be completely sealed off from the air, so you must find some way to cover it without leaving any gaps for air to enter.
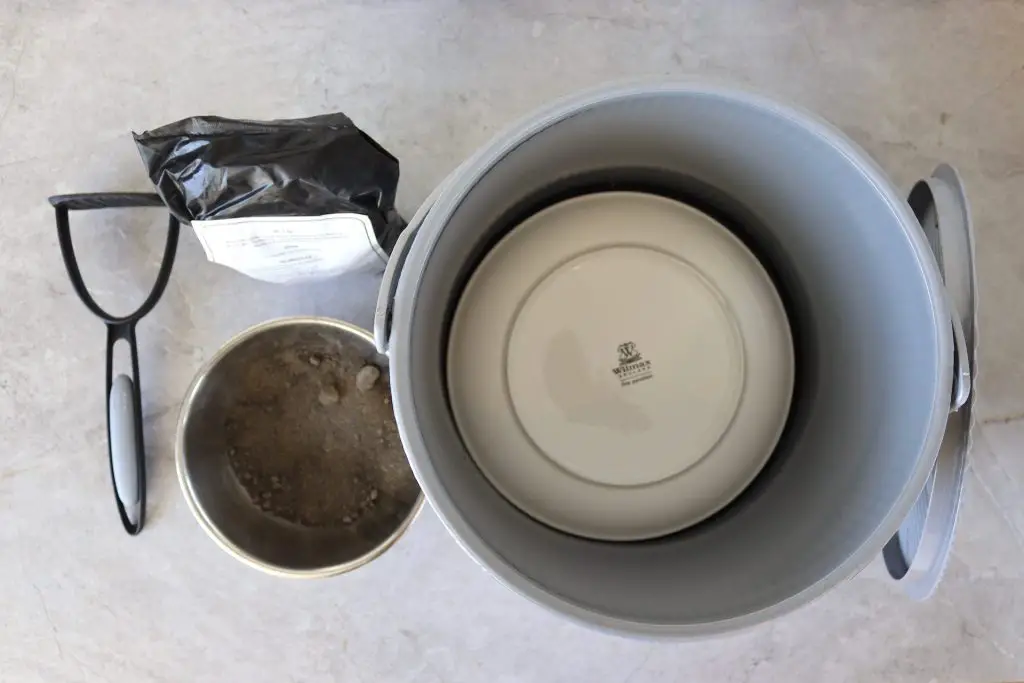

If you’re lucky, your bin will come with a part for this exact purpose, and you can just put this on top of your waste when you’re done.
I wasn’t so lucky, so I had to find a solution myself.
Many people recommend using a plate, but I didn’t have any plates that exactly fit my bin. They all left slight gaps, so this didn’t work for me.
Instead, I use a plastic bag and weigh it down with lots of small rocks. This might look like overkill, but it’s the only way I found to effectively block any air from reaching my bin. Even the tiniest of gaps could spell disaster.
Another trick I intend to try soon is filling a plastic bag with sand and using this. I can see this working well because the sand will spread out and fit into all the groves and dips on the surface of your bokashi.
3. Drain the liquid from the bin every two days
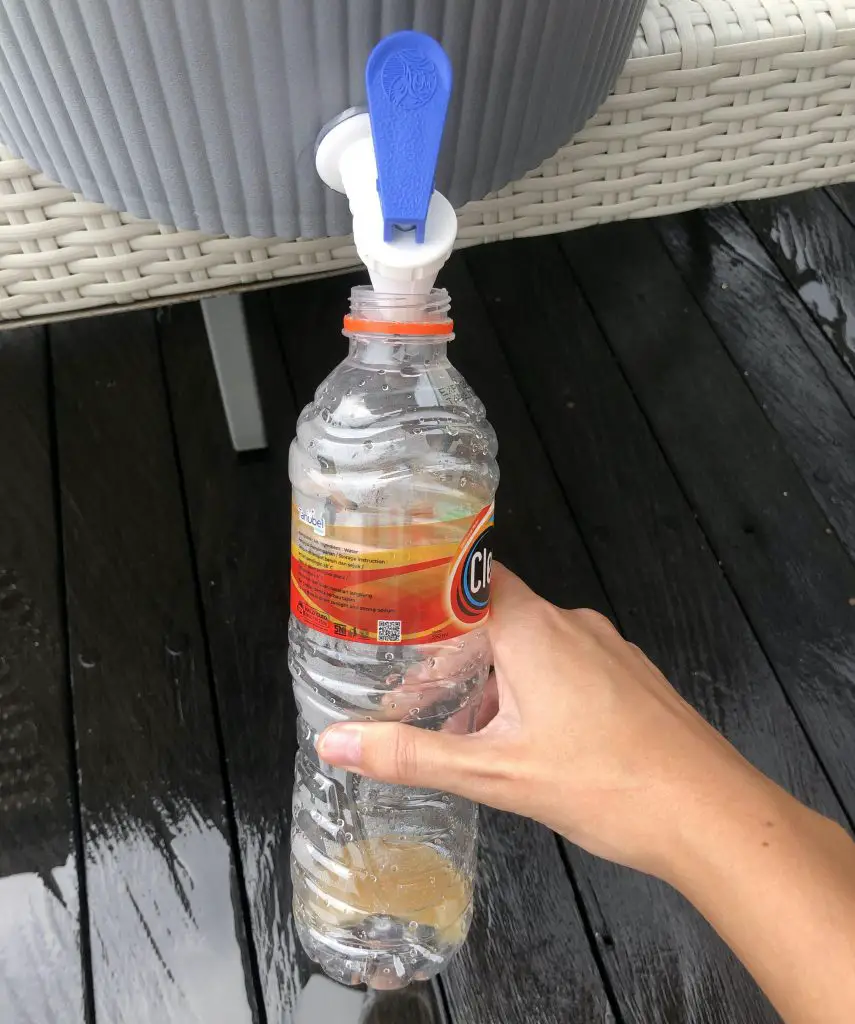
Check your bin for liquid buildup every two days by opening the spigot.
You don’t want the liquid to build up too much because it can drown the microbes and stop the bin from working.
Draining the liquid often also helps to stop the liquid from rotting and starting to smell bad.
You may need to tilt the bucket forward to get all the liquid out. When I first started bokashi, I left the liquid below the tap line in the bin for a couple of weeks, and when I did eventually tilt the bin to drain it smelt like vomit.
I thought my bin had gone wrong, but after some research, I realized I had just left the liquid sitting too long.
The contents of your bin will determine how much liquid you get and what color it will be.
Some bins will produce a lot of liquid, but it’s also normal for a bin to produce hardly any liquid. My current bin isn’t producing a lot of liquid because I’ve used quite a bit of bokashi bran and a lot of dryer ingredients like bread.
You can dilute the bokashi tea and use it as fertilizer for your plants, or simply pour it down your drains where it will get rid of any bad smells.
Fresh bokashi tea should smell similar to vinegar.
If the liquid smells rotten, this indicates that not all is well in your bin. The best thing to do here is open the bin and add some more bokashi bran to try and get the fermentation process back on track. You should also press down on the bokashi to drain any liquid building up throughout the waste.
Then hope for the best! If the bin ends up failing, don’t worry too much you can still use the contents of the bin it will just take longer.
3. Once the bin is full, seal the lid and wait for two weeks. Continue to drain the liquid every two days
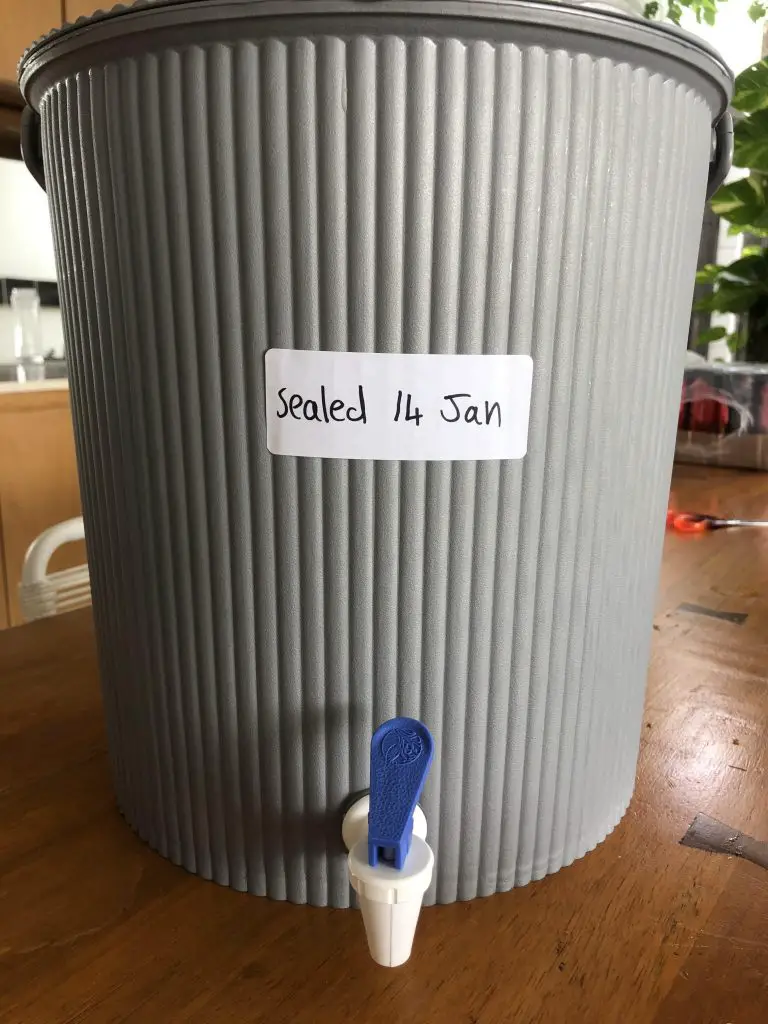
When the bokashi bin is full, sprinkle one last layer of bokashi bran for good luck, then close the lid. Make sure the lid is tightly sealed and that the tap is closed. Doing this ensures that there’s no chance of air getting in.
Place the bin somewhere at room temperature and away from direct sunlight, then leave it for two weeks.
I leave mine in the corner of my spare bathroom and label it with the date I sealed it in case I forget (I also have a do not open sign after a guest once mistook it for a bathroom bin!).
Over the two weeks, the microbes will feast on your food scraps and turn them into a nutrient-rich pre-compost.
The bin will continue to produce liquid, so ensure you don’t forget to drain the bin at least every two days. You can periodically lift the lid and press down on the contents to help squeeze as much of the liquid out as you can.
Two weeks is the minimum you need to leave the bin; if you’ve added lots of meat or other harder-to-digest materials, I suggest leaving the bin for around three weeks. This will ensure the microbes have had enough time to do their job.
4. After two weeks, check to see if the waste has fermented properly
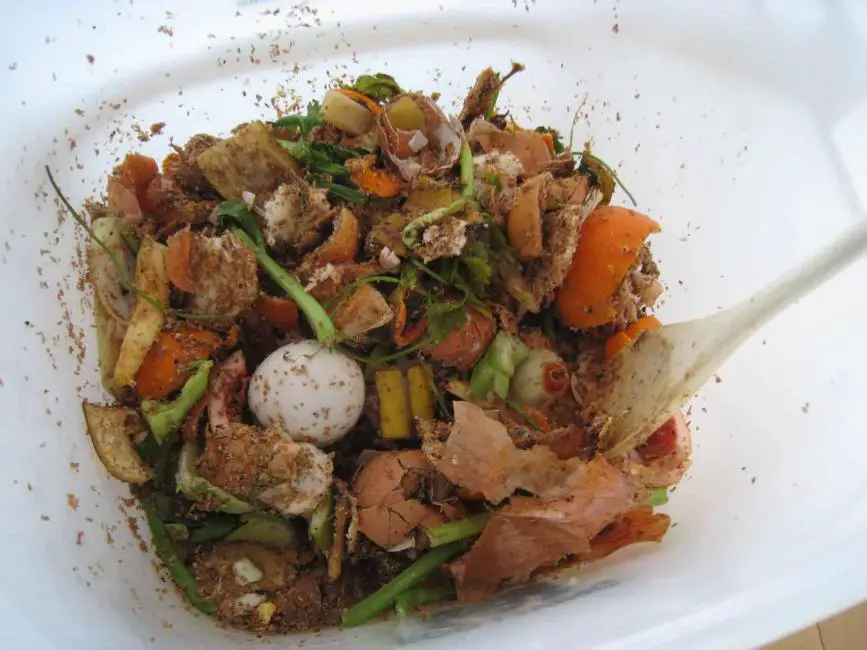
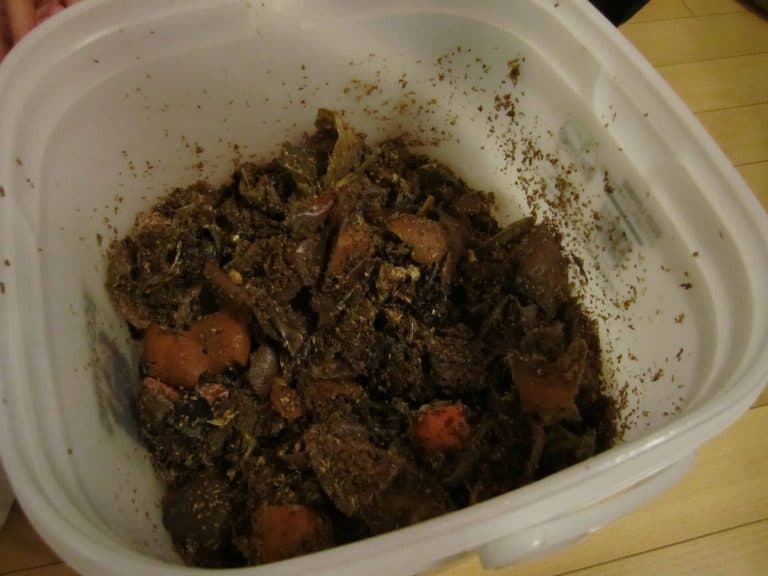
After two weeks (or longer), the microbes should be done with the food waste, and you can open the lid to check what’s inside. What you’ve made is known as bokashi pre-compost.
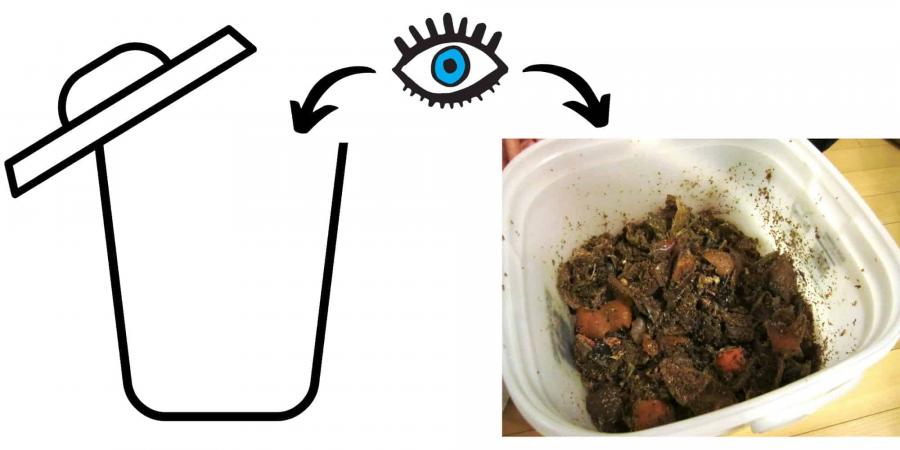
You’ll still be able to make out some of the food you put in, but don’t worry, that’s normal. Fermentation is a preservation method, so the scraps won’t decompose until you take them out of the bucket and expose them to air.
The mixture should smell similar to pickled food and have a sweet odor. If the bin smells rancid or rotten, then something went wrong and you should dispose of the mixture.
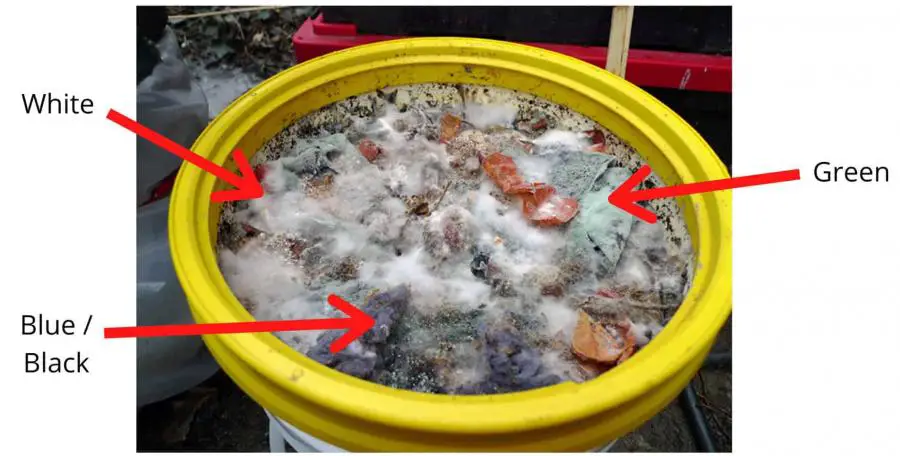
You might see some white mold which is absolutely fine, but black, blue, or green mold is a sign the bin has failed.
5. Bury the waste
If everything seems normal, you can take the bin outside and bury the bokashi pre-compost in your garden or put it in your compost bin.

The pre-compost is very acidic, so it shouldn’t come into contact with any plant roots for at least another two weeks.
Burying the pre-compost gives it time to neutralize and release its nutrients into the soil.
We discuss several different ways of processing the pre-compost in the section: What can I do with bokashi pre-compost?
What can I use as my bokashi bin?
I use a purchased bin that’s designed for use with bokashi. You can use a homemade bin, but I prefer the pre-made method because there are several things that can go wrong with makeshift bins.
Namely, it might not be 100% airtight, or there might not be adequate drainage.
Lots of people chose to have two bins, so while one is resting, you can start filling the other one up. Otherwise, you have two weeks where you have nowhere to put your food scraps (unless you have a traditional compost bin or a worm bin).
You can choose to either purchase the bin with traditional bokashi bran or with a liquid bokashi inoculant. The liquid inoculate is great if you’re short on storage space, but it’s easier to see how much bran you’ve used with the traditional stuff.
What can I do with bokashi pre-compost?
Bokashi pre-compost is very acidic and needs to be processed further before it’s ready to be used in your yard.
How you process the bokashi is up to you. There are several options which we go through below.
Bury the bokashi in your yard
The most commonly suggested way of processing bokashi is to bury it in your yard. You can either dig a trench and bury all the waste in one area or dig a few potholes throughout your yard to spread the pre-compost out.

Dig a trench around 8-9 inches deep and empty the bokashi bin’s contents into the hole. Add some soil and mix it into the bokashi before covering it with at least 6 inches of soil.
The microbial life and worms in the soil will break down the fermented waste turning it into nutrient-rich compost in 2-4 weeks. The more bokashi you try to process, the longer it will take.
Once it’s done, you can plant directly into the area where you buried the bokashi, or you can take the compost and use it elsewhere in your garden.
Make a soil factory
If you lack garden space, one option to consider is to process your bokashi pre-compost in a soil factory.

A soil factory mimics the bokashi being buried in a yard but in a contained space. You can make a soil factory in three easy steps:
- Cover the bottom of a plastic tub with a few inches of soil
- Mix the bokashi with some soil and place it in the bucket
- Cover the bokashi with a further 5-6 inches of soil
After a few weeks, the factory will turn your bokashi into compost. It won’t be as fast as burying the pre-compost in your yard because there’s less microbial activity. That said, the process should be finished within about four weeks.
Store the bokashi
If you don’t want to process your bokashi immediately, that’s fine. You can store the pre-compost mix in an airtight container until you are ready to bury it.
The mixture will continue to ferment for a week or two until the microbes fall into a dormant state. You can store the bokashi for as long as you want. Just don’t expose the mixture to any air. Air will cause the pre-compost to rot and smell bad.
Bury the bokashi in your compost bin
If you have a traditional compost bin and a bokashi bin, you can bury the bokashi pre-compost in your compost bin.
The extra microbes will give a bit of a boost to your compost pile. If you’ve noticed your compost slowing down, Bokashi is an excellent thing to add.
Feed the bokashi to your worms
You can add bokashi pre-compost to a worm bin as long as you take a few precautionary measures to stop the worms from becoming overwhelmed with the acidity of the food.
In the next section, we discuss best practices for feeding bokashi to your worms.
Give it away
If you’re producing more bokashi than you can deal with, you can always give it away. Local gardens and community centers will gladly take the pre-compost off your hands and use it in outdoor spaces.
You could even offer it around your neighborhood – you never know what you might be offered in return!
Can you feed bokashi to worms?
Yes, you can absolutely feed bokashi to worms. Most worms actually love bokashi because it’s already half decomposed and teaming with microbes. The only thing to remember is that because bokashi pre-compost is quite acidic, you need to add something alkaline like eggshells to counteract this.
Worms like to live in an environment with a neutral pH (7). Bokashi pre-compost has a pH of around 3-4. Continually adding bokashi to your worm bin can alter the pH of the whole bin and upset the worms. To prevent this from happening, you should add something with a higher pH along with your bokashi. Good things to add include crushed eggshells or garden lime.
As with any new food, start off by feeding the worms slowly while they get used to the bokashi. Once the worms are used to it they can consume bokashi really quickly. Combining bokashi with a worm bin is a good way to process a lot of waste in a small urban space such as a balcony or an apartment.
If you want to know what else you can feed to worms make sure to check out our ‘what can you compost tool‘, where you can filter for vermicomposting.
How to clean a bokashi bucket
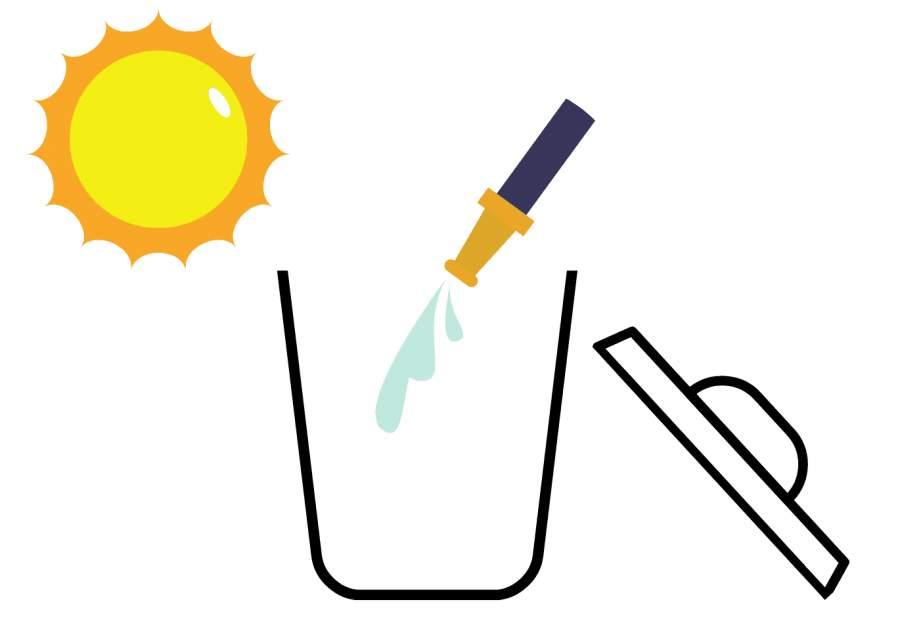
To clean a bokashi bucket, rinse it out with water and leave it in the sun to dry. The UV rays will kill any harmful bacteria that have developed in the bin. If you do want to use a cleaner, make sure it’s natural. Never use a chemical cleaner in your bokashi bin.
Don’t forget to rinse the spigot as well because sometimes they can get blocked, leading to unwanted odors.
You might be wondering if you have to clean the bin out every time you use it.
No, you don’t have to clean your bokashi bin every time you use it. If you’re going to start refilling the bucket in a day or two, then it can actually be beneficial not to clean your bucket out. Not cleaning it means you leave a bunch of microbes in the bin to help kickstart your next batch.
You should always clean the bucket if you’ve had a failed batch, if it’s going to be more than a few days before you start filling up your bin again or if the container itself smells funky.
Common bokashi problems
Bokashi rarely goes wrong, and when it does, it’s usually easy to spot what the problem is and how to fix it.
Here are some of the most common queries we get regarding Bokashi bins and what they mean.
There’s mold in my bokashi bin.
White mold in a bokashi bin is a healthy sign and means your microbes are hard at work fermenting your food waste. On the other hand, any green, blue, or black mold is a bad sign and means that your waste has started to rot instead of ferment, likely because air got into your bucket.
If there’s only a little bit of unwanted mold, try sprinkling some more bokashi bran over the affected area and leaving it for a week. If the mold disappears, you can go ahead and use the pre-compost as usual. If there’s a lot of mold, or it doesn’t go away, then sadly, the batch has failed.
You need to empty the bin and thoroughly clean it before starting again.
To discard failed bokashi, dig a deep trench in your yard and leave it buried there for a few months. The mixture will slowly rot down and eventually turn into a useful soil amendment.
Sometimes you’ll notice mold up the sides of the bin. This indicates you’ve got some food residue stuck on the sides of the bin, and as it’s been exposed to air, it’s started to rot. In this case, wipe the mold off with a bleach solution and fill the bin up.
Why does my bokashi bin smell?
If your bin smells of anything other than pickled food (sweet and acidic), this is a sign that something’s gone wrong. Your bucket should not smell bad. Usually, unpleasant odors are a sign that air has gotten into the bin, and this is causing the food to rot rather than ferment.
Another reason for bad-smelling bokashi is too much liquid. If your bin isn’t draining properly, the liquid can drown the bokashi microbes and prevent the fermentation process from taking place. Make sure to press down on the contents of your bucket regularly to help the liquid drain.
If you’re halfway through the bin and it’s just started to smell, you might be able to salvage it by adding some more bran and draining the liquid.
If this doesn’t work, the best thing to do is empty the bin, clean it, and start again.
Luckily failed bokashi isn’t totally useless. Bury it deep in your yard, and eventually, the microbes and worms in your soil will turn it into compost.
If it’s the bin itself and not the food waste that’s getting a bit stinky, this is a sign it’s time to clean the container.
Why are there maggots in my bokashi bin?
Maggots are typically a bad sign, but if you see them in your bokashi bin, there’s nothing to worry about. They won’t do any harm. The acidic environment, plus the lack of oxygen, will kill them very quickly, so they won’t be around for long.
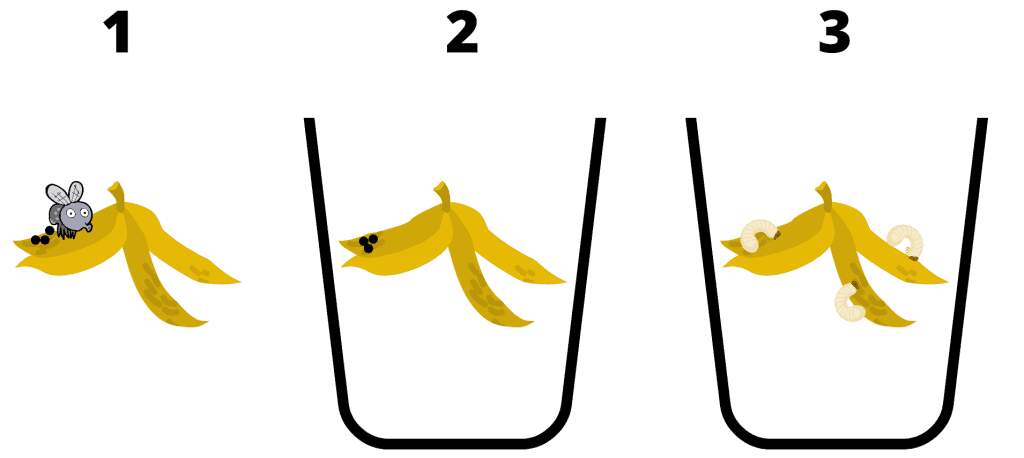
Flies like to lay their eggs on food waste. What probably happened is that a fly laid their eggs on some of your food waste, which you unknowingly placed in your bokashi bin. If the maggots aren’t gone within a few days, this is a sign that your bokashi bin isn’t acidic enough to kill them. In this case, try adding some more bokashi bran.
Even though maggots aren’t harmful, let’s face it, no one wants a bucket full of maggots in their house! Here are a few tips to minimize the chances of maggots finding their way into your bin:
- Keep your food scraps away from flies in an airtight container.
- Make sure the lid and tap on your bokashi bin are tightly closed.
- When you open the bokashi bin to put food scraps in, do it as quickly as possible. You could even keep a fly zapper on hand to swat away any flies that come near.
Rodents are finding my buried bokashi.
If this is the first time you’ve buried any bokashi in your yard, then the rodents are probably just interested in what’s going on.
They’re observant creatures who have likely seen the freshly dug-up earth and assumed something tasty is there for them. Bokashi is too acidic for most pests, so once they’ve tasted it and realized they don’t like it, they won’t return.
Pests are unlikely to be a recurring problem, but if they are, try leaving the bokashi in the bin for an extra week to make sure it’s fully fermented. You can also place netting over the freshly dug-up ground to prevent rodents from digging in.
Why did my bokashi bin fail?
If you’re wondering why your bokashi bin has failed, is smelly, or has mold, it’s likely due to one or more of these five reasons:
- Your bokashi was exposed to air
- Not enough bran
- Inactive bran
- The food waste wasn’t chopped up small enough
- Fluctuating temperatures
Your bokashi was exposed to air
Air is the enemy of bokashi. The microbes that ferment the food waste don’t like oxygen. If there’s too much oxygen in your bucket, the anaerobic microbial population will die off and be replaced by aerobic microbes that decompose food rather than ferment it. Decomposition is a very smelly process compared to fermentation.
Air can get into you bucket a variety of different ways. For example:
- There could be a crack in your bin
- The tap could be open
- The lid might not be shut properly, or you’ve left it open for too long
- There might be too many air pockets in the food waste
Not enough bran
Bokashi bran is the stuff that inoculates your food waste with microbes. If there are not enough microbes in the bin, then the fermentation process can be slow to get going, and the food will start to rot.
If you’ve checked your bokashi bin for cracks and are sure that too much air isn’t the problem, then try being more generous with your bokashi bran. Also, make sure that you’ve spread the bran out evenly in the bucket. If you add all the bokashi bran to the top of the bottom of the bucket, it’s not going to be as effective.
Inactive bran
The microbes in bokashi bran are living things, and over time the bran can lose potency, especially if it hasn’t been stored properly.
The bran should be less than 18 months old, and you should store it in an airtight container in a cold, dry place.
If you’re using homemade bran, even though the bran is fresh, the microbial mixture could be off or not concentrated enough.
The food waste wasn’t chopped up small enough
Larger pieces of food waste in a bokashi bin take much longer to ferment and can end up rotting before the microbes have had a chance to process them.
If I have a lot of food to chop up, sometimes I chuck it all in my blender and give it a blitz for a few seconds. This is a real time saver!
Fluctuating temperatures
The bokashi process works best at room temperature. If you’ve left your bucket somewhere where the temperature varies significantly from room temperature, this will increase the chances of your batch failing.
Try moving your bokashi bin to somewhere with a more constant, room temperature (68–72 °F).
Bokashi vs Composting
Bokashi differs from composting in the fact that it ferments the food waste rather than decomposing it. Many people refer to bokashi as bokashi composting, but this is actually quite misleading because there are many significant differences between the two methods.
Is bokashi better than composting?
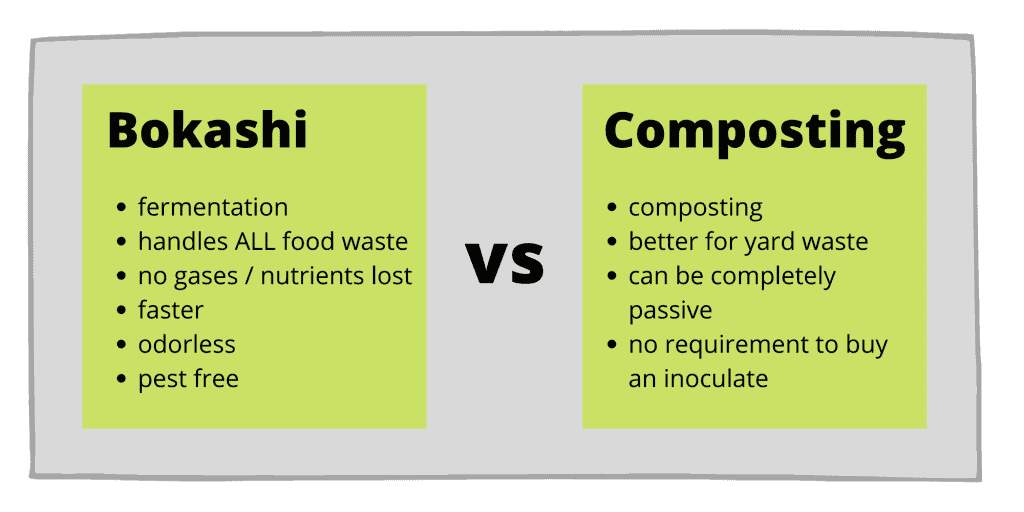
Bokashi is faster, requires minimal work, and can handle food waste such as meat and dairy that traditional composting can’t. However, bokashi isn’t as good at dealing with yard waste, and you also have to commit to either buying or making your own bokashi bran. Composting doesn’t need any added extras.
We go into further detail on the most important differences between the two methods below.
What can you compost?
Bokashi can recycle all your kitchen waste, including meat and dairy. You can compost these with traditional composting methods, but you risk the pile becoming very smelly and attracting a lot of rodents, so most people avoid it.
If you’re a meat-eater and want to recycle all of your food waste, then bokashi is a great solution.
On the other hand, if you have a lot of garden waste and high carbon materials, traditional compost is better. Bokashi requires a lower C:N (carbon:nitrogen) ratio than composting.
Time / Labour
Bokashi is much quicker than composting. If speed is your primary concern, bokashi is the way forward.
In terms of labor, composting can be more or less work than bokashi depending on the method you use.
Cold, passive composting requires the least work out of any soil amendment making process. But it also takes the longest and is prone to smells and pests.
Hot composting requires a lot of care and attention because you have to make sure the mixture of materials you add is just right. Plus, the pile needs regular turning.
Bokashi is somewhere in the middle. You don’t need to worry about the ratios of carbon and nitrogen, and there’s no turning involved. But you do need to drain off some liquid every few days and dig a trench to bury the pre-compost (unless you use the bokashi in your compost pile).
Nutritional value and greenhouse gases
Composting is an aerobic process and the microbes respire.

During respiration, oxygen is converted to carbon dioxide (CO2) and water (H2O). Both of these are lost as gases to the air.
CO2 is a well-known greenhouse gas that we want to avoid putting into the air.
Bokashi uses anaerobic microbes that don’t respire, and therefore no CO2 is released.
As they work, the aerobic microbes in composting use nitrogen and energy.
The nitrogen is converted to gaseous forms and lost to the air. The energy is lost in the form of heat during respiration.
Both energy and nitrogen are valuable to plants, so the fact some are lost in the composting process isn’t great. Bokashi microbes don’t use nitrogen or energy. Both remain in their original forms in the fermented material.
So it looks like bokashi is the winner here. But bear in mind that what happens to the nutrients in the fermented material once you bury it is a bit of a mystery. There haven’t been any significant studies done to answer that question.
Pathogens and seeds
Compost piles rely on heat to kill pathogens and seeds, but unfortunately, most home compost piles don’t get hot enough to kill anything. Therefore, to be safe, most people avoid composting things that could foster harmful bacteria or have seeds that could re-sprout later.
Bokashi relies on creating an acidic environment to kill seeds and pathogens. Every bokashi bin should become acidic enough to succeed in killing harmful bacteria and seeds. So there’s no need to worry about de-seeding all your fruit before putting them in the bin.
Smells and pests
Bokashi is an airtight system, so it doesn’t release any odors and won’t attract any pests. Composting, on the other hand, isn’t airtight, and it can sometimes smell.
Frequently Asked Questions
The first time you try bokashi, it can be a bit daunting, and you’ll probably have a lot of questions.
Hopefully, most of these questions have been answered above and in the following section. But if there’s something you’re unsure about, let us know, and we can include it.
How do I store bokashi bran?
To store bokashi bran correctly, you need to keep it in an airtight container (that’s not biodegradable or the microbes will eat it!), away from direct sunlight at room temperature, and dry. Even if all these conditions are met, the bran doesn’t last forever. For best results, ensure the bran is less than 18 months old.
What can you do with bokashi liquid?
Bokashi liquid is the liquid you drain out of the bucket every other day.
It’s water from the food waste that’s been enriched with a load of anaerobic microbes, similar to compost tea. You can use the bokashi tea as a plant fertilizer, or you can pour it down your drain to keep them smelling fresh.
To use as a fertilizer, dilute the juice with water to a 1:100 ratio and water your plants as usual. Bokashi juice is best used straight away (within 24 hours) and can’t be stored. Microbes are living creatures, and there’s no food source for them in the juice, so they’ll start to die off very quickly.
Can you keep a bokashi bin outside?
I wouldn’t recommend that you keep a bokashi bin outside because the fermentation process works best at room temperature. In the summer, outside would be too hot for the bokashi microbes. In the winter, it would be too cold.
How much bokashi bran should I add to my bin?
You should add 1-2 tablespoons of bokashi bran for every 2 inches of food waste, but you can never add too much bran. Be generous!
The bran contains the microbes that will ferment your food, so you must have enough of them in your bin. Food like meat and bones are more challenging for microbes to process. If you have a lot of these foods in your bin, then add more bran.
Can I use bokashi in the winter?
Because you can do bokashi indoors, the fermentation process will work well all winter.
The second step of burying the bokashi becomes a little trickier in the winter because the ground is harder, but it’s not impossible. You need to allow more time for the pre-compost to neutralize in the soil. During the winter, this step will take 6-8 weeks rather than 2-4 weeks.
To make things easier, you can prepare for winter by pre-digging trenches in your yard ready to be filled with bokashi. Or, if you have enough storage room, you can leave the pre-compost in its fermented state until the spring when it’ll be easier to bury.
Does bokashi smell?
Bokashi should smell slightly sweet and fruity but acidic at the same time.
Similar to pickle juice or vinegar.
If the bokashi smells putrid or rotting, then something has gone wrong.
You should only be able to smell the bin when it’s open. When the bokashi bin is closed, it’s an airtight system. No smells, good or bad, can escape.
What can you not put in bokashi?
You should avoid putting too much liquid in your bokashi bin, as well as already moldy food and large bones.
Too much liquid can drown the microbes, while large bones are just too big to be processed in the two-week time frame. Moldy food can cause other foods in the bin to become moldy, and this can lead to the whole batch failing.
How long does bokashi take to decompose?
The fermentation process takes 2 weeks. The second step of burying the pre-compost takes a further 2-4 weeks. So the whole bokashi process can take up to 6 weeks. In the winter, when decomposition is slower, the process can take up to 8 weeks.