The first time I noticed that my compost had clumped into balls, I was a little confused. If this has just happened to you too, don’t worry – it’s probably not an issue. In this article, I list a few possible reasons for this and practical steps to prevent this from happening in the future.
Clumping is usually a sign that your compost is too wet and therefore sticking together and forming balls. Compost balls are a common occurrence in compost tumblers, where the rotating motion encourages clumping. To fix the problem, add some more browns into your bin. Materials like shredded leaves or paper help soak up any extra moisture and create a coarser texture that’s less prone to clumping.
Are compost balls bad?
The main things to consider when you notice clumping in your compost are the size of the clumps, what’s inside the clumps when you break them up, and if the clumps smell or not.
If the balls are less than an inch in diameter, then they’re nothing to worry about and will break up quickly on their own.
More often than not, the balls are larger. People often describe having clumps the size of a golf or tennis ball. The best thing to do in this situation is to break up one of the clumps and see what’s inside.
Balls of finished compost
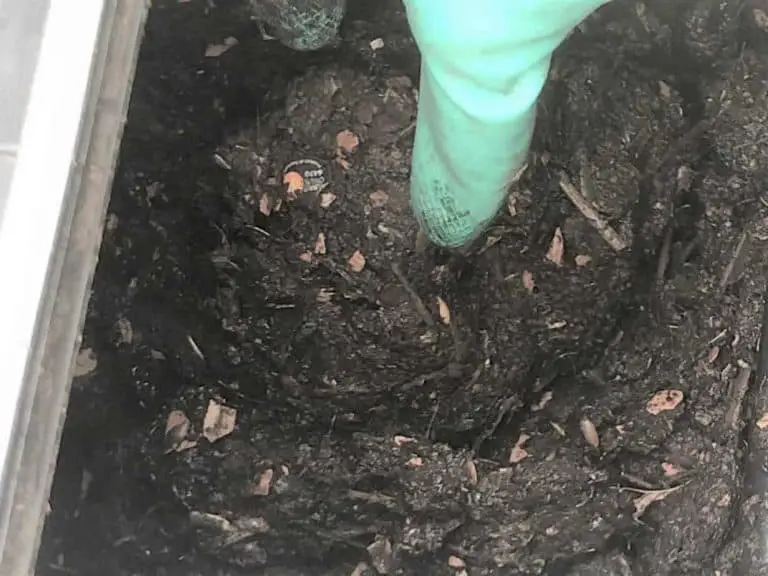
If the balls crumble easily into a soil-like substance, then you have clumps of finished compost.
Compost tumblers are prone to creating compost balls, even with finished compost, due to motion and turning of the device.
Compost balls are fine to use as they are. But if you want a finer textured compost, then you can break the clusters up.
If you decide to break up the compost, here are a few tricks to save you the trouble of doing it all by hand:
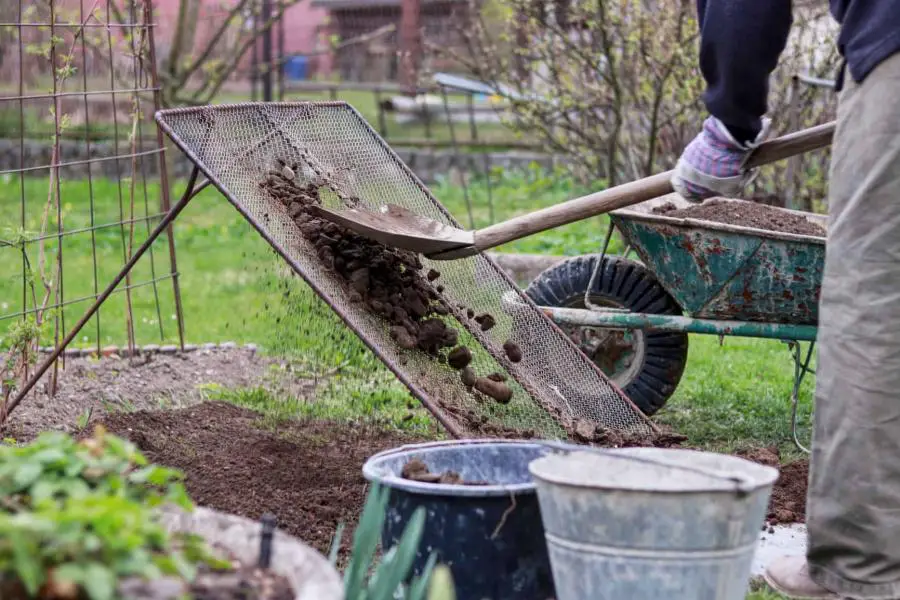
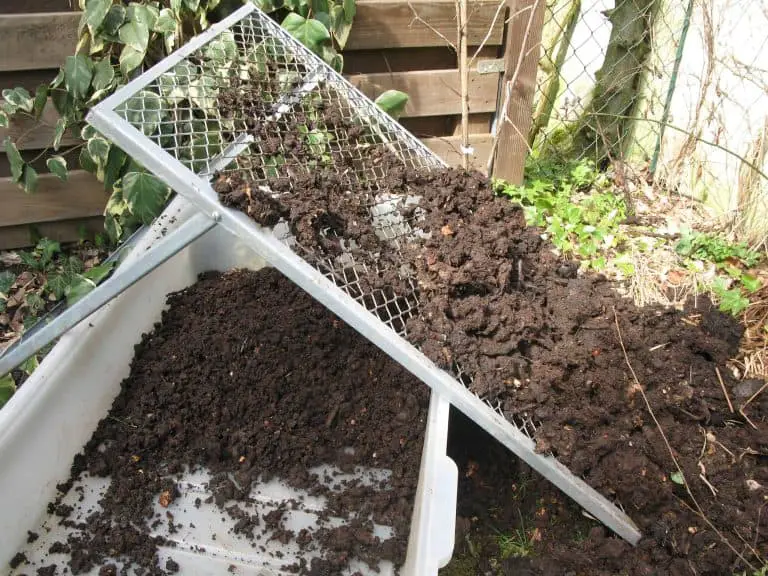
- Run the clusters through a compost screen. If there are any really stubborn clumps, you can put them aside and throw them into the next batch of compost. The balls will help innoculate the new batch because they’re already full of beneficial microbes.
- Lay the compost out on the ground and run all over it. You’ll have to have some old shoes for this, but it can be quite therapeutic, and your kids can help.
- Empty the bin into a container such as a wheelbarrow and use a pitchfork to mix the compost up. This should break up most of the balls reasonably quickly, but it might not be super fine. If you have a weed eater, this will work as well.
- Throw the balls into a leaf shredder or chipper shredder. If you own either one of these devices, you can chuck the balls in there and get compost dust out the other side. You’ll have to put the balls in one at a time, so if there’s a lot, this option can take some time.
- Leave the compost to cure a little longer. Eventually, the balls will break up on their own.
If you decide to use the compost balls as they are, they’re great for:
- Using under plants. The balls will release their nutrients more slowly and help sustain the plants for longer.
- Using as a rough mulch around fruit trees and shrubs. Mulch helps water retention in the soil, prevents weeds from growing, and reduces soil erosion.
- Making compost tea. This is a great way to increase the nutritional value of your compost, check out our ultimate compost tea recipe to get started.
Balls of unfinished compost
If when you break open the balls, they smell and are filled with recognizable materials, then your compost is probably too wet and has turned anaerobic.
Too much moisture can cause the compost to clump and slow down the decomposition process.
Either you’ve put too much of one material that’s prone to clumping in, or your browns to greens ratio is off.
Green materials like kitchen waste and fresh yard waste have high moisture content, while brown materials like dry leaves soak up moisture. If you don’t have enough brown stuff in the bin, then excess water has nowhere to go. Too much water in your bin creates an anaerobic environment and drowns the microbes. With no microbes present, the composting process grinds to a halt, and this causes the bin to become smelly.
To fix this issue, add some more browns to your bin and mix it thoroughly. Adding browns to your compost will not only help break up the clumps but will also introduce some much-needed oxygen. You could also leave the bin out in the sun for a bit to help the compost dry out.
Common materials that cause compost to clump
Any wet materials you introduce will add moisture to your compost bin and make it more likely to clump. That said, some materials are more prone to clumping than others.
- Eggshells or citrus rinds that are only broken in half. Anything with a hollow inside is going to fill with compost and cause clumps to form.
- Eggshell cartons. Similarly to eggshells, if you put the carton in your compost bin with the cup shape still intact, then it will fill with compost and create a compost ball.
- Grass clippings. Grass clippings are often the culprit of clumping in compost bins because people tend to add them in one big batch. Grass clippings are naturally wet material and will quickly stick together, forming big clumps that can easily become anaerobic.
- Wet shredded paper and cardboard. If you add paper or cardboard into an overly damp compost pile and don’t adequately mix it, you risk creating compost balls made of soggy paper.
How to prevent compost balls
Although compost balls can be quite hard to avoid in tumblers, there are ways to minimize the risk.
Chop or shred everything before you put it in the compost bin
Making sure that you finely chop everything before you add it will help stop materials from clumping together. There are a few tools that can help you do this. If you’re shredding a lot of cardboard or paper, then a heavy-duty shredder like the one we’ve linked from Amazon will get the job done in no time. Much better than doing it by hand or using scissors!
If you have a lot of yard waste, then investing in some form of garden shredder will save you a tonne of time. For leaves, this leaf shredder from WORX is perfect. It has a big open hopper so you can pile lots of leaves in at once. If your yard waste has lots of stalks or twigs in, then you’re better of getting a chipper shredder like this one from Sun Joe. It will reduce your waste up to 1/16th of its original size.
Buy a compost tumbler with built-in spikes
The best compost tumblers come with lots of drainage holes and spikes on the inside that break up the compost as you turn. The addition of the spikes stops the compost from clumping too much.
This compost tumbler from FCMP Outdoor has ‘deep fins’ on the inside, which double as ergonomic handles that make the bin really easy to turn.
Add a compost starter
The faster the composting process is happening in your bin, the less time there is for clumps to form. Adding a compost starter will innoculate your pile with lots of beneficial microbes and get your compost tumbler cooking quickly.
Put some rocks in the tumbler
If you already have a tumbler and it doesn’t have the fins we spoke about above, then you can substitute these with rocks. Rocks work in the same way as dryer balls in a dryer. They’ll help break up the material in the bin when you turn it and stop it clustering together. The only downside to this method is that it can make the bin quite heavy, meaning it’s harder to turn.
Drill some more drainage holes in your compost bin
If your tumbler isn’t draining efficiently, this could be the reason your compost keeps getting too wet. Drilling a few extra holes in your bin can help give the moisture more places to escape.
Get the right mix of greens to browns
The most important thing to get right in a compost bin is the ratio of greens to browns, but this is no easy feat. The exact ratio you need depends a lot on the types of waste you’re putting in the bin, so there’s no easy answer to what it should be.
As a guide, 1 part green to every 3 parts brown is a good place to start. You can monitor your bin and adjust this as you see fit depending on the moisture levels you see. The compost should have the texture of a wrung-out sponge.
A good tip is to put some browns in the bin every time you put some greens in. This will help you maintain a good balance. Check out our guide on how to start composting for more tips.
Compost balls in worm compost bins
If you have compost balls in your worm farm, then it’s likely made of worms rather than compost. Worms instinctively ball up when they sense danger to protect themselves. Common issues include the bin being too hot or cold, or having the wrong type of bedding.
To learn more about how to keep your worms happy, check out our complete guide to worm composting. We also have a roundup of the best worm composters to help you pick the right bin.