Traditional composting can be a very slow process that puts some people off.
On the other hand, Worm composting is a very efficient process that you can do indoors or outdoors. Yep, you read that right. You can compost with worms indoors (with the right worm bin)!
If you’ve always wanted to start composting but didn’t feel like you had enough time or space, then vermicomposting is for you.
I’ve put together a comprehensive guide to get you started.
What is worm composting?
Worm composting, or vermicomposting, uses worms to recycle organic matter into high-quality compost. The worms will eat your food scraps, turning it into compost as it passes through them. Once the worms have finished digesting the scraps, they poop out what are known as worm castings or vermicast. These worm castings make excellent organic fertilizer for your garden.
Benefits of worm composting
Worm composting is fast becoming just as popular as standard composting. Especially with young city dwellers because of how easy and efficient it is. The benefits of vermiculture are:
- Vermicomposting doesn’t smell – the worms are quick workers and process the waste before it has a chance to start stinking
- You can do it in small indoor spaces, including apartments and balconies – because it’s an odorless system and doesn’t create a mess, there’s nothing to stop you from setting up a worm bin inside. There are other ways to compost indoors that don’t involve worms, but vermiculture is the best option for most people
- There’s not a lot of work involved – the worms do most of the work for you! The only jobs involved are feeding the worms, which should only take around half an hour each week, and harvesting the worm castings every 3-6 months. Harvesting the compost can take anywhere between an hour to half a day, depending on the method you use
- Worm compost bins are cheap to set up and maintain – worm farms start from around $30 for a homemade one, up to about $130 for a high-end commercial option. After the initial set up cost, the only thing you need to maintain the bin is bedding material. Bedding can be as simple as some shredded paper
- Worms will make compost all year round – although there are tricks you can use to heat compost up in the winter, most composting methods come to a virtual standstill as the weather gets colder. Not worm bins. As long as you keep your worms warm enough, they’ll produce a continuous stream of compost all year long
Worm bins
The first step in getting started with worm composting is to set up your worm bin, otherwise known as a worm hotel or worm farm.
I recommend the Worm Factory 360 or the Urban Worm Bag. They’re good quality worm bins with cool designs that make looking after your worms and harvesting your compost easily. Check out my in-depth review of the Urban Worm Bag for more information.
Or you can make your own worm bin.
How to make a DIY worm bin
Making a worm bin is easy. The simplest DIY worm bin is a plastic tub with a lid and a few holes drilled in the bottom.
Worms are surface feeders, so a shallow box between 8 and 16 inches deep is best. The worms will generally only live in the top 6 inches of bedding.
The lid stops the worms from escaping and keeps pests out, while the holes help with drainage and aeration.
One plastic tub is placed inside another to catch any liquid runoff
To make sure any liquid runoff doesn’t drip on your floor, it’s a good idea to elevate your tub inside a bigger container. You can use anything for legs. For example, I use small upside-down ceramic pots.
Where to put a worm compost bin
There are two main things to consider when thinking about where to put your worm bin: temperature and ease of access. The best location is somewhere easy to get to, shady, and that has a consistent temperature between 55-80 degrees.
Some suggestions include:
- Kitchen corner
- Patio
- Garage
- Outside your back door
Worms are very sensitive to temperature. If it’s too cold, they won’t work as hard, and if it’s too hot, you risk cooking the worms alive! Never place your bin in direct sunlight for long periods.
You also want it to be somewhere quick and easy to access, so it’s not hard to keep an eye on your worms. And so you don’t get tired of having to empty your scraps into the bin.
As discussed previously, I suggest both indoor and outdoor locations. Both have their pros and cons.
An outdoor worm bin is more suited to a large family with a lot of waste because it allows for a larger capacity and less attention to detail. When the bin’s outside, smells and pests are less of a concern.
The downside to outdoor bins is that sometimes it can be too cold in the winter, so you need to insulate your bin or bring it inside if that fails.
Indoor bins can handle less waste and require more care. But you don’t have to worry about fluctuations in temperature or harsh weather conditions such as rain ruining your bin.
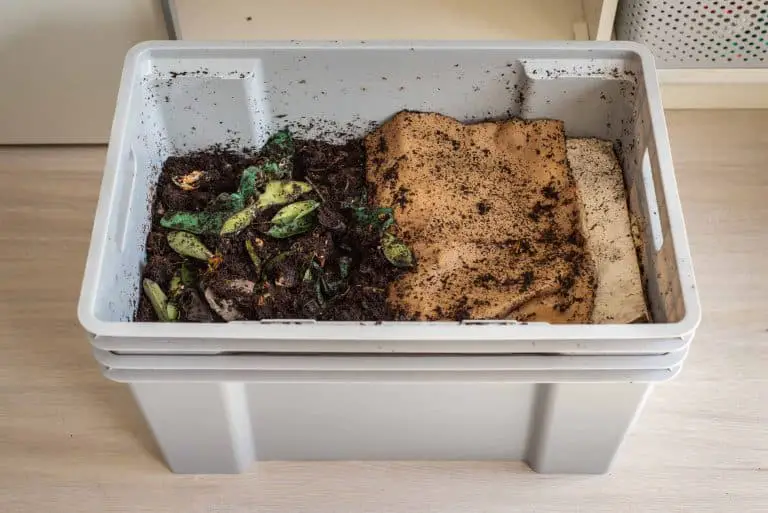
Worm bin bedding
Once you’ve decided on a location for your worm bin, you need to prepare it for the worms.
To do this, you fill it with what’s commonly referred to as bedding.
You should make your worm bedding using carbon-based cover materials that have a neutral pH, retain moisture well and allow oxygen to flow. Around 50% of a worm’s diet is made up of their bedding, so make sure it’s something they like to eat too!
The best bedding materials for a worm bin:
- Coco coir
- Shredded paper
- Shredded cardboard (my favourite)
- Dry leaves or straw (composted leaves and straw is better)
- Aged compost
- Aged manure
- Garden soil
- Peat moss
- Wood Chips (use sparingly)
To keep your worms extra happy, use a mixture of materials to create a balanced environment. Using a combination will also result in better quality compost with higher nutritional diversity. I like to combine shredded cardboard and aged compost with some garden soil for extra grit. Ground limestone or crushed eggshells also provide grit and a source of calcium.
Before you add the bedding to the bin, you’ll need to dampen the materials. Slowly pour over some de-chlorinated water and mix it all together. The bedding should be visibly moist, but shouldn’t release water when you squeeze it.
If you add too much water by accident, add some more dry materials.
What worms to use
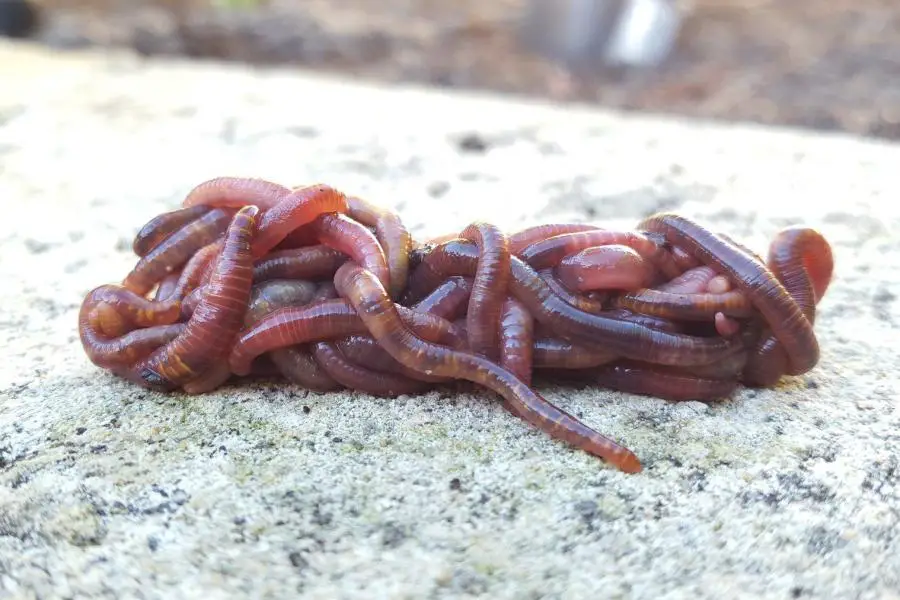
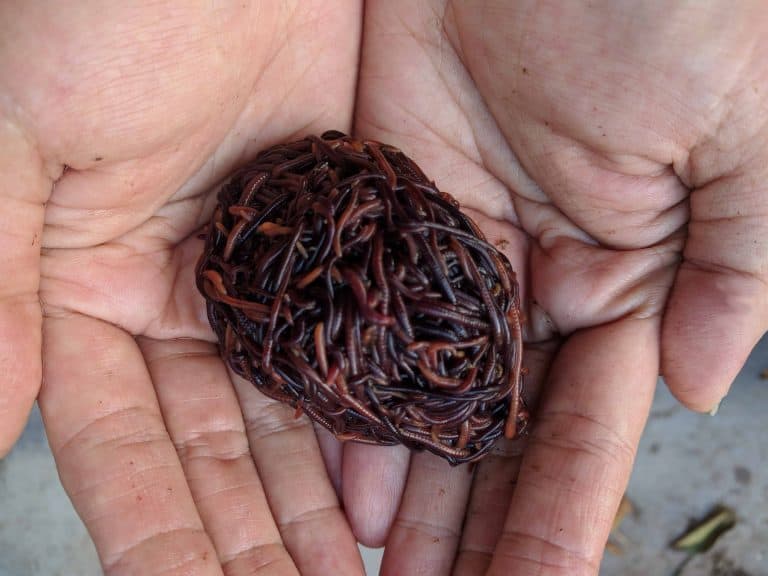
The best worms to use for composting are red wiggler worms. Red wigglers are efficient at breaking down organic waste, reproduce quickly and thrive in confined environments.
Red wigglers can recycle around half their body weight in food per day, so 1 pound of worms can eat 1/2 a pound of food per day. This includes food scraps and bedding.
You can use this ratio to work out exactly how many worms you need.
For most people, a pound, which is roughly equal to 1000 worms, should be enough to start with. Once you put them in the worm bin and start feeding them, they’ll start reproducing. The worms are very clever and will regulate their numbers to match their food supply.
What to feed the worms
Worms aren’t fussy creatures and will break down most organic matter you give them.
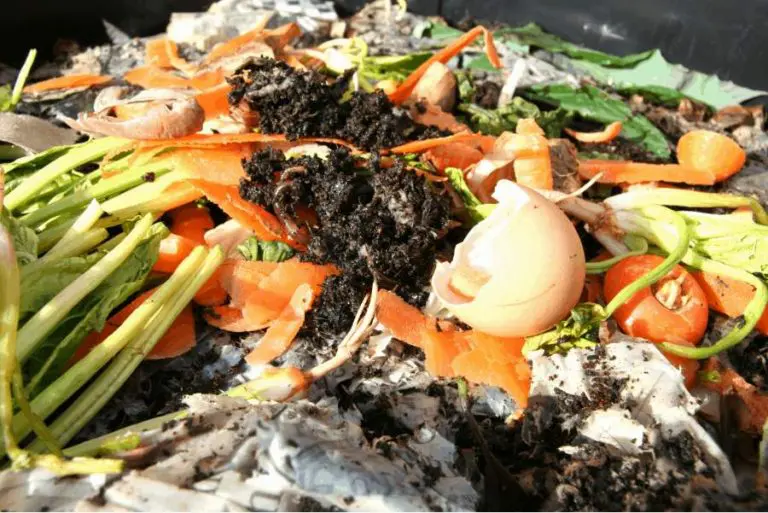
Fruit and vegetable scraps, coffee grounds, paper towels, napkins, grains, bread, pasta, non-plastic tea bags, bokashi pre-compost, and dead plants are all great things to put in your worm bin.
Some foods you should avoid include:
- meat, fish, and dairy
- processed foods
- fats and oils
- overly salty or spicy food
- greasy foods
- too much citrus (especially the rinds)
- the outer layer of onions
- feces from carnivores (use a composting toilet for this, check out my DIY composting toilet)
For a more in-depth list of what you can and can’t feed your worms, check out this excellent worm food rating list on Stephan Kloppert’s worm composting blog.
The main reason to stay away from meats and dairy is that they’re very prone to attracting flies and will increase the likelihood of your bin smelling. Too much citrus is bad for the bin because it creates an acidic environment that the worms don’t like.
Worms find the peels hard to break down so they can start to rot before the worms fully digest them. If you have a small bin or put too many in this can cause the bin to start smelling.
Still wondering what to feed your worms?
Check out my new composting tool. It lets you search and filter specifically on what worms can and can’t eat.
Before you put anything in the bin, make sure to break any larger pieces up. Then dig a hole and bury the food along with some new bedding. This helps to maintain the delicate balance of carbon and nitrogen in the bin.
Completely cover the scraps and put the lid back on.
You should aim to feed your worms once every few days rather than every day to minimize how often you disturb them. Start slowly and then gradually increase the amount of food you give them to prevent them from becoming overwhelmed. As the number of worms in your bin increases, they’ll be able to handle more food. Before you put any more waste in, check they have started to break down the last lot of scraps. If they haven’t, wait a few more days before checking again.
If you notice anything the worms seem to be avoiding, take it out of the bin and make a note not to put that particular food in again.
The worms can survive for quite a long time with no food, so it’s fine to leave them for a few weeks and go on holiday. Just give them a bumper feed before you leave.
Worm blankets
If you live in a dry environment you might find it useful to put a worm blanket on the top of your bin.
You can buy a ready-made worm blanket (usually a jute matt), or you can just use a few layers of damp cardboard or paper.
Most worm bins will have a lid, but the blanket provides an extra layer of protection against light, keeps moisture within the bin, and helps regular the bins temperature. Keeping the upper layers dark and moist means the worms are more likely to stay at the top of the bin where the food is.
Harvesting the compost
When you notice all the bedding is gone, it’s time to harvest your compost. This should happen every 3-6 months.
In preparation for harvesting, don’t feed your worms for around a week. This gives the worms a chance to get through everything in the bin.
There are three different methods you can use to collect the worm castings.
The lure method
This method requires the least effort because it doesn’t involve emptying your bin. However, it takes the longest overall.
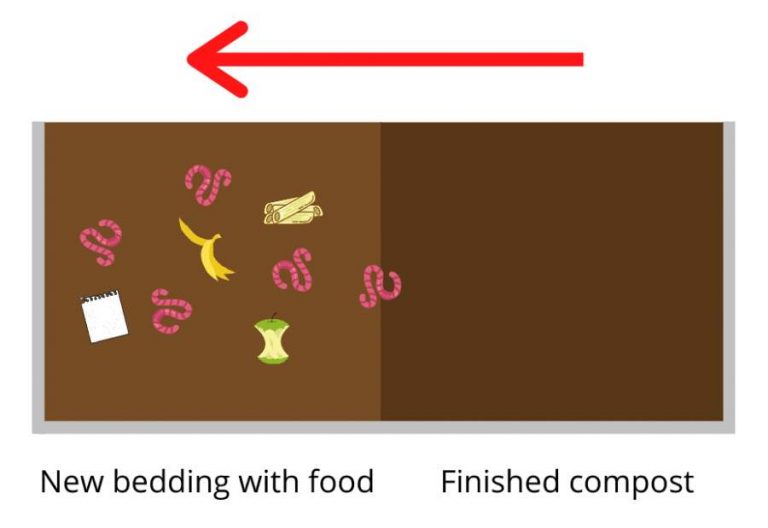
You need to move the contents of the bin over to one side and freshly prepare the other side. Over the next 1-2 weeks, the worms will migrate over to the new side, leaving the finished side free for you to remove. Make sure in those few weeks you only put food into the fresh side of the bin, think of this as bait for the worms. The hungrier your worms are, the faster they’ll move.
This is how stackable commercial worm bins work. Once the worms finish a section, they’re encouraged to move up into a new part of the farm so you can harvest the lower trays.
The dump method
The dump method can take around half a day but doesn’t require any waiting.
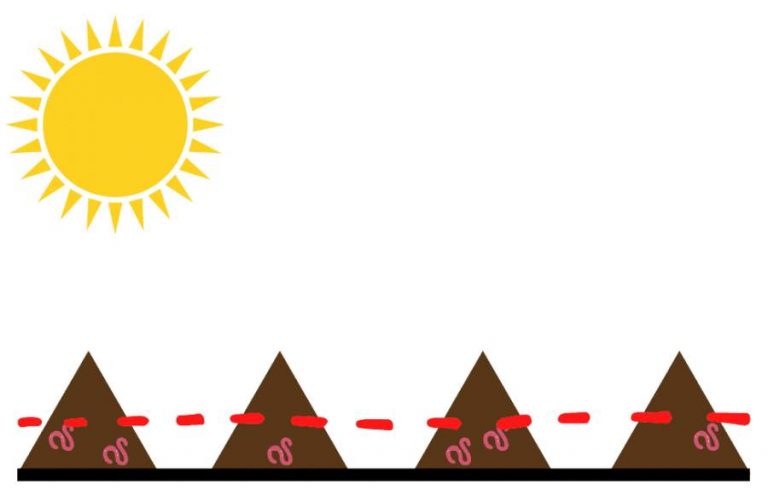
Empty the contents of your bin onto a large plastic sheet and arrange it into small mounds. Worms prefer darkness so will bury themselves in the bottom of the pile, which means you can harvest the top.
Keep repeating the process until you have most of the compost and then re-prepare the bin.
The screening method
You might be familiar with screening if you’ve ever used traditional compost.
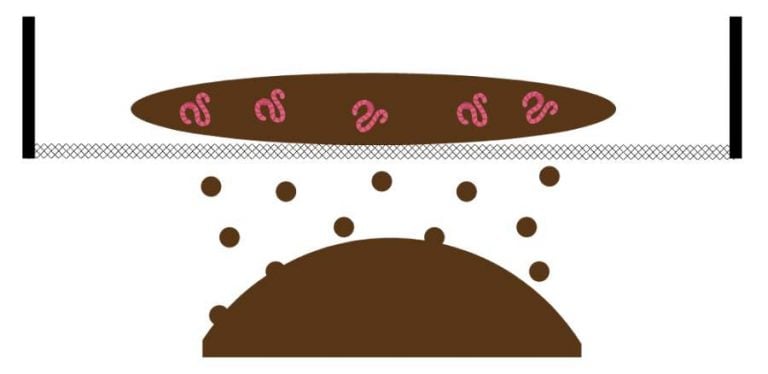
To make a screen, you need some wire mesh that’ll let compost through, but not worms. Place this over a wheelbarrow or bucket and then use it like a giant sieve.
Soon you’ll be left with just a pile of worms ready to be put back in their bin.
How to use worm compost
You can use vermicompost in all the same ways you’d use regular compost. The only thing to bear in mind is that worm castings tend to be much more concentrated than regular compost.
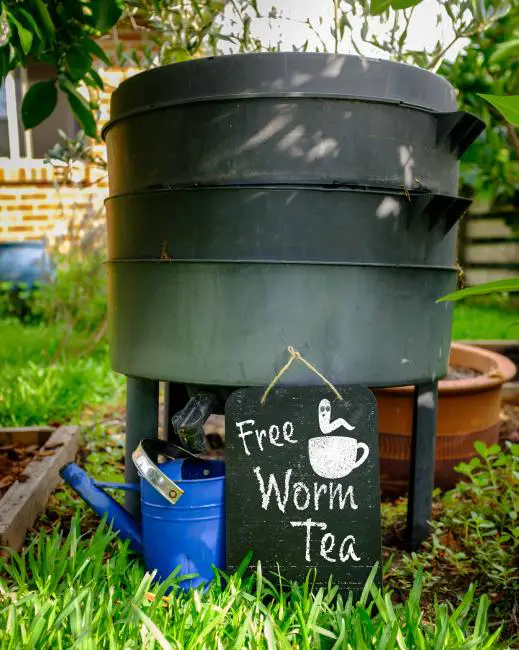
You can also use the liquid that drains out the bottom of your bin (worm leachate) as a liquid fertilizer. I recommend diluting it first with 10 parts water to 1 part worm juice. Lots of people refer to this as worm tea, but worm tea requires a bit more work.
If you’re interested in making your own, check out my worm tea recipe for more information. Worm castings make an excellent base for compost tea because they’re so nutrient-rich.
Troubleshooting
While composting with worms is relatively simple, problems can still arise.
There’s four main signs that something’s not right:
- worms dying
- worms escaping
- bad smells
- flies and pests
Compost With Worms Problems
| Diagnosis | Problem | Solution |
|---|---|---|
| My worms are dying | They’re not getting enough food | Feed them some more scraps. If you have too many worms to feed, then remove some and donate them to a neighbour, or release them into your garden |
| My worms are dying | It’s too hot or too cold | Change the location of the bin to somewhere with a more moderate temperature. You can also try insulating the bin with straw, or cooling it down with ice packs. |
| My worms are dying | The bedding is too dry. The worms are dehydrated and suffocating because they cant tunnel through the bedding | Water the worm bin until it’s visibly damp, but not so wet it’s dripping. Add a worm blanket to your bin to stop too much moisture escaping |
| My worms are dying | The castings need to be harvested. If the concentration of finished compost gets too high this can kill the worms | Harvest the compost |
| My worms are dying and my bin smells | The bedding is too wet and the worms are drowning | Add in some more dry materials like shredded paper to soak up the excess moisture |
| My bin smells and is attracting flies | There isn’t sufficient air circulation in the bin | Check the bins drainage holes aren’t blocked, and drill a few more to encourage better air flow. Adding a few wood chips will help improve the structure of the bedding |
| My bin smells and is attracting flies | You’re feeding the worms the wrong type of food (i.e greasy food or large chunks in one go) | Only put suitable foods in the bin, and make sure you chop everything into manageable sized pieces |
| My bin smells and is attracting flies | The food scraps are exposed | Make sure you completely bury the scraps before putting the lid back on |
| My bin smells and is attracting flies | You’re overfeeding the worms. If there’s too much food, the worms wont get to it before it starts to rot and smell | Remove any rotting food and reduce the amount of scraps you put in the bin until your worm population grows |
| My worms are escaping | This is a sign they don’t like their environment. Likely it’s too acidic, the wrong texture, or the wrong temperature | Reduce the amount of citrus fruits you’re putting in the bin, check the moisture levels and temperature. Experiment with different types of bedding to find one the worms like better |
| My worms are escaping | You have a pest infestation and it’s driving the worms away | Empty the entire contents of the bin and start afresh. Make sure to get rid of any unwanted eggs |
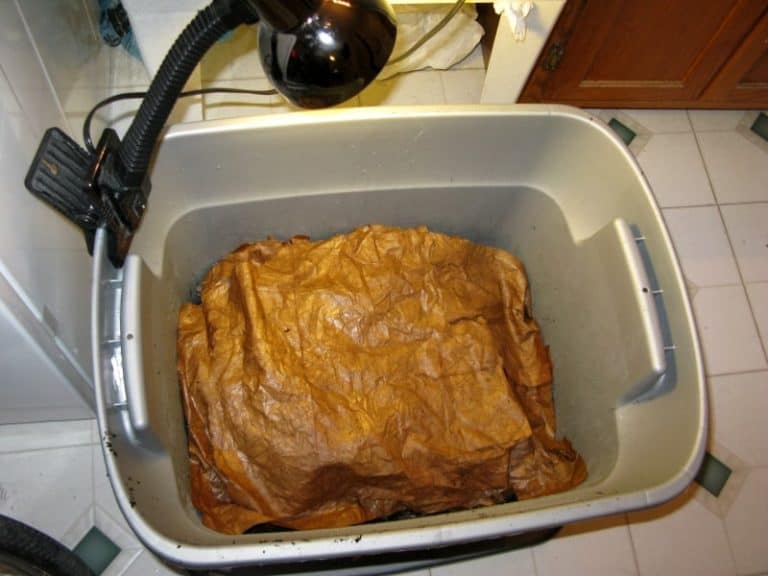
Worm composting in winter
Worms work most efficiently in temperatures between 55-80 degrees. When it starts to get colder than this they’ll slow down and stop eating as much. If temperatures drop below 40 degrees then the worms are at risk of perishing.
If you don’t mind your worms not working in the winter, then insulating your bin with some hay and moving it to a more sheltered location should be enough to keep your worms alive.
If you want to carry on composting, then the best thing to do is move your worms inside or take a heater outside (a hot water bottle works wonders!). Worms will only go dormant if the temperature drops. If you prevent this from happening, then you’ll have to problem producing compost all throughout the winter.
Summary
Hopefully you’ve found this guide helpful and are now ready to start composting with worms.
If you’re interested in learning more, I highly recommend the book How To Start A Worm Bin from Henry Owen at wormcompostinghq.com.