
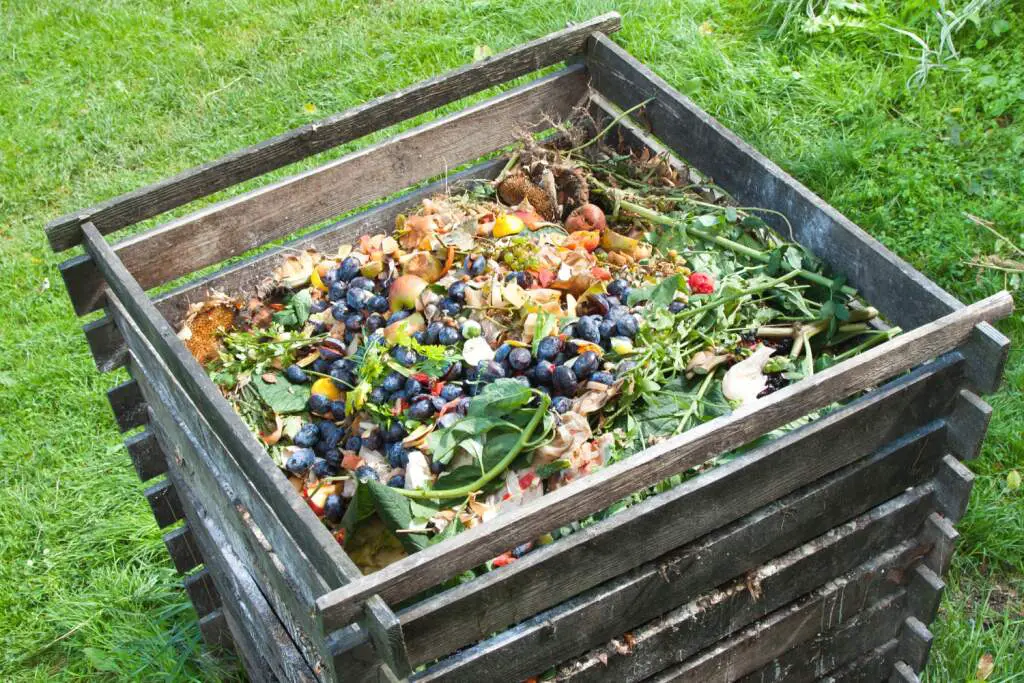
Whether you’re growing veggies or flowers, good compost can help your garden grow rich and lush. Not only that, but it’s a great way to get rid of just about any kind of plant debris. Melon rinds, lawn waste, and grass trimmings can all contribute to your compost heap.
Then again, a loose compost heap can be a blight on your otherwise-beautiful lawn. Fortunately, you don’t have to spend a ton of money on a prebuilt bin. Here’s how to build your own pallet compost bin in the space of an afternoon.
If you want to know more about what you can and can’t compost, check out the graph in this article How to Compost: A Definite Guide.
Supplies You’ll Need To Build a Pallet Compost Bin
First off, you’re going to need four pallets for the compost bin. Ideally, they’ll be the same size, but it also works if you can cut them to the same size. Be careful, though. Look for either the IPPC or EPAL logo, which will indicate that the pallets are reasonably strong. You’ll also want to make sure the pallets have the letters “HT” stamped somewhere on the side. This indicates that they have been heat-treated, which will keep toxic chemicals from seeping into your compost. Whatever you do, never use pallets that have an “MB” stamp, since they have been treated with toxic pesticides.
In addition to the pallets themselves, you’ll also need some hardware to put everything together. Get a set of four heavy-duty corner brackets, exterior wood screws, and a set of four hinges for the front. You’ll also need a hook and eye catch and a circular saw, along with a drill and a screwdriver for assembling everything.
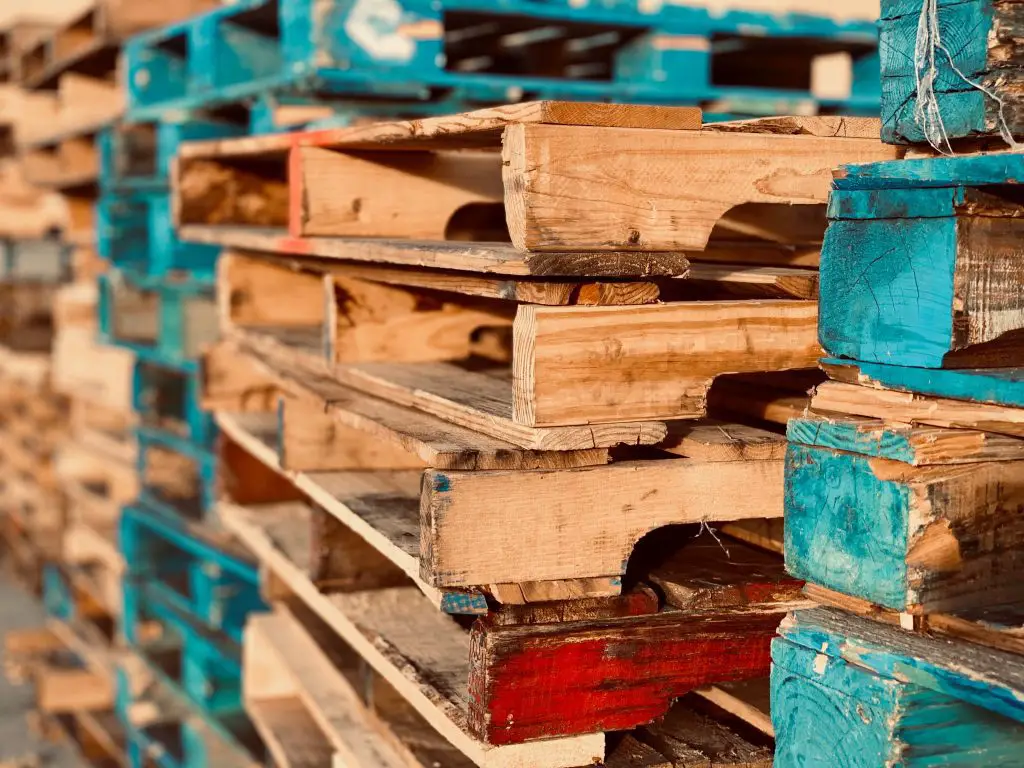
Photo by Brent Keane from Pexels
Where to Find Pallets
So, where do you find a good set of pallets? A small business is going to be your best bet. Most large companies sell their pallets back in order to save money, but small businesses usually don’t have enough pallets for it to be worth the trouble. Then again, it never hurts to ask at your local big box store.
It helps if you can get all of your pallets from the same place. This makes it easier to get pallets that are the same type. This isn’t strictly necessary, but it’s easier on the eyes.
Constructing Your Pallet Compost Bin
Before you get started, make sure your pallets are in good condition. Check them for any cracked or broken boards, and repair them if necessary. It’s a lot easier to fix a pallet now than after the bin has been put together. Scrub them down with a mild soap, rinse them dry, and set them up without screwing them together. Take a minute to figure out which sides will face in, and which will face out.
Also, decide which pallet is going to be the front. Using your saw, cut this in half vertically, making sure to cut between two slats, trimming the excess boards on both sides.
Now, set up the back and sides where you want them, and screw them together with the wood screws. Make sure the side pallets are flush to both sides of the back when you do this. Once they’ve been screwed together, put two of the corner brackets in each of the rear corners, and screw them in place.
Next, take your doors, and attach them to the front using two hinges on each side. Install them on the front face of the bin, so the doors can easily swing outwards. Make sure to set the doors a couple of inches above the ground, so they have room to swing outwards. Install your hook and eye near the tops of the doors, so it’s easy to access.
Optionally, you can add more reinforcements, such as plate brackets on the back. You can even drive rebar stakes through the front or back corners into the ground, to keep the bin from moving around.
At this point, you may want to wrap chicken wire around the bin, to help keep material from falling out. This can be helpful if the pallet slats are widely spaced, but it’s not necessary, especially if the slats are closer together.
You can also stain your pallet if you want to; it certainly makes your compost bin look more attractive. But if you do, make sure to only stain the outside. If you stain the inside, chemicals from the stain could leech into your compost.
Adding Optional Planters
Even a homemade pallet compost bin is fundamentally hard to make pretty. It’s full of rotting plant matter, after all. But what better place to grow a few extra flowers? The hollow back and sides of a compost bin provide an ample opportunity for doing just this.
Take some burlap fabric, or even landscape fabric, and cut it so it sags down about a foot between the gap in the sides, leaving plenty of excess fabric. Staple it into place, and trim the edges with a pair of scissors. You’ll also need to cut slots for the vertical inner rails, so the fabric can hang freely between them. Fill the pockets with soil, and plant whatever flowers or other ornamentals you want.
Creeping vines and perennials are a great choice since they’ll continue to flourish year upon year. Make sure to water your plants regularly, at least until they’ve become thoroughly established. Another good idea is to surround the base of the compost bin with more flowers. Evergreen creepers like ivy are a great choice for making your bin feel like part of the landscape.
Using Your New Pallet Compost Bin
To produce the best possible compost, you want to add an even mixture of green (wet) and brown (dry) materials. Too much moisture, or not enough, can cause the composting process to slow down. Not only that, but an excessively wet mix will not be able to admit air, which can cause the composting process to shut down altogether.
It’s ideal not to mix your compost as you add more material. Simply fill the bin and let the process work. If you have a lot of compost, you can always add more space by building additional bays onto the sides of your existing pallet compost bin.