Are you a complete beginner and want to learn how to compost? Or perhaps you already have a composting bin but don’t think it’s working to its full potential?
This is the article for you.
I’m a massive fan of composting. Not only is composting great for the environment, but it also provides free and valuable fertilizer for your soil.
It’s the last step in a materials circle of life. Composting something returns its nutrients to the earth, where they work to nourish growing plants. And the best thing is anyone can do it. There are even options for urban composters.
I’ve put together a complete guide to composting. It covers everything from what to put in your compost bin to any problems you might encounter.
Why compost?
The US Environmental Protection Agency (US EPA) estimates that in 2017 we generated 40.7 million tonnes of food waste.
According to the study, we sent 75% of the food waste to landfill and composted a measly 6%.
What I’m referring to as food waste actually holds something very valuable – nutrients.
When food waste is sent to landfill, not only is the energy used during transportation but as the food rots, its precious nutrients are lost and it emits methane gas. Methane is a greenhouse gas that’s roughly 30x more potent than carbon dioxide.
By composting your organic waste at home, you’re reducing the amount sent to landfill, and lowering methane emissions.
The nutrients you get from the compost go a long way to creating healthy soil. And healthy soil means happy plants.
Composting basics
You can think of composting as a sort of experiment.
Just like a chemical reaction, it requires you to balance a variety of different elements to get the desired outcome.
Fortunately, it’s nowhere near as hard as chemistry.
The four main ingredients that go into compost are:
- Carbon
- Nitrogen
- Oxygen (from the air)
- Water
Oxygen and water are self-explanatory, but you may be wondering how you can get carbon and nitrogen into your compost.
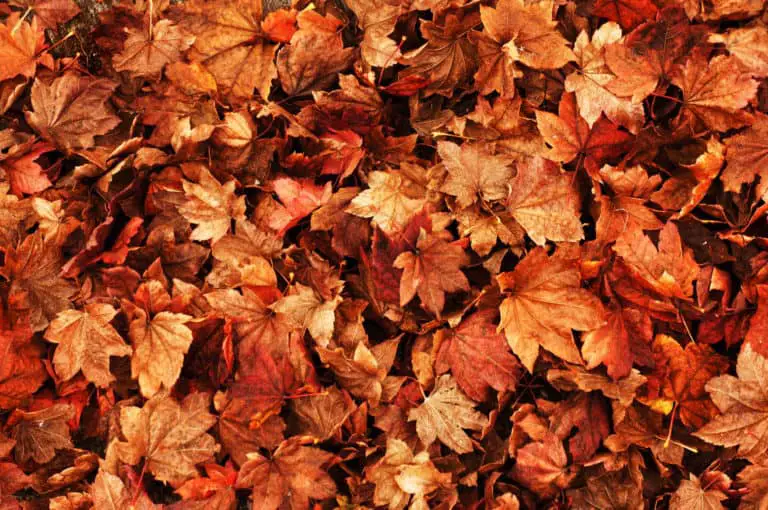
You can add carbon via what’s known as brown materials. These are dry, fibrous materials such as straw or dry leaves.
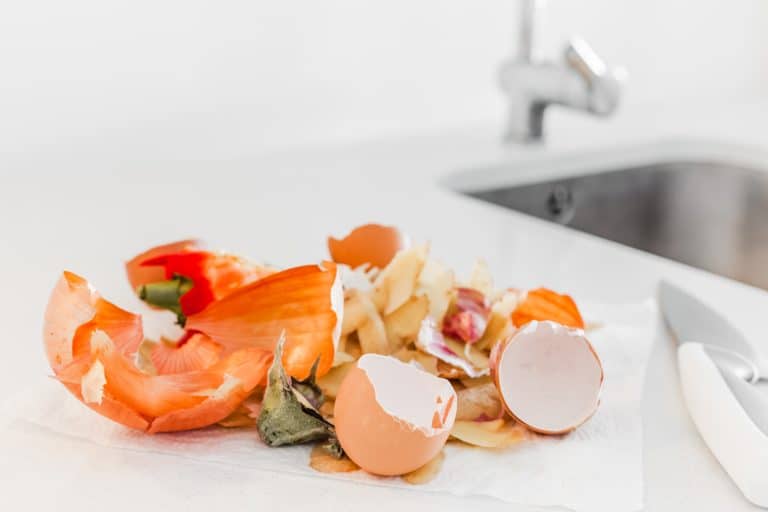
You can add nitrogen through green materials such as kitchen scraps. These materials tend to be moister, so can also act as a source of water.
When you add all four of these elements together in the correct ratio, the microorganisms that break down organic matter can thrive.
Carbon provides energy to the organisms, and the bulky nature of the materials helps to break up the compost pile allowing oxygen to reach the middle. Oxygen helps the organisms work more efficiently.
Brown materials also help manage moisture, block smells, and keep pests away. But add too much, and the pile will become dry.
Nitrogen-rich materials are a source of protein for the microorganisms; without this, they wouldn’t be able to grow and replicate. However, add too many, and the pile will become soggy and start to smell.
Moisture levels need to be carefully controlled in any compost pile. Too much water will stop air from circulating, and too little will slow the decomposition process.
The mixture should be comparable to a damp sponge in texture.
Not sure what this means? Grab a handful and squeeze it. The handful should remain in a ball after you let go and only release 1-2 drops of water.
Think you’ve gone a bit wrong? Don’t worry.
It’s not really possible to ruin compost. You’ll just slow down the process a little.
I’ve come to realize that every problem can be fixed with time, and by adding a bit more of the right ingredient. Towards the end of the article, I’ve put together a troubleshooting guide for common problems.
What will I need?
To get started, you only need two things:
- stuff to compost (organic material)
- a space for the compost (I’ve discussed different types further on)
As always there are a few optional extras that can help to make your life easier:
- an aerator tool (or a long-handled pitchfork)
- compost thermometer
I told you it wasn’t too complicated! Ready to get started?
What can I add to compost?
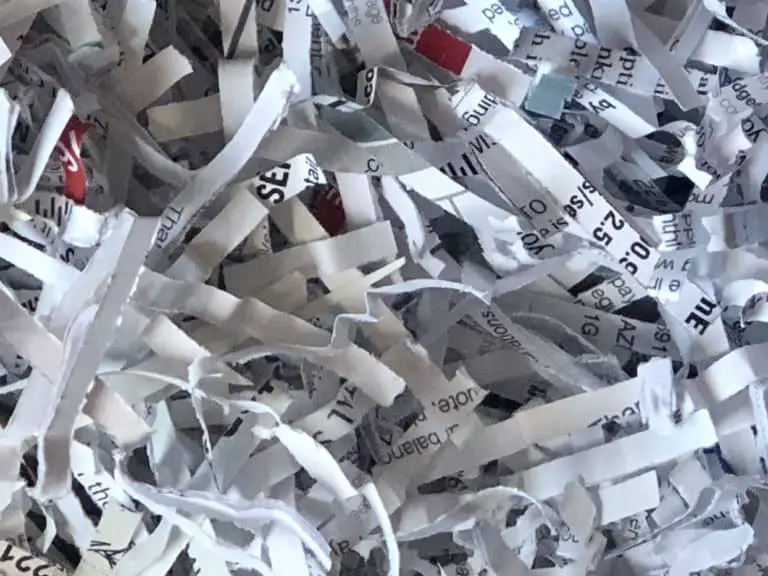
The general rule of thumb is that you can compost anything that’s been alive. For example, paper has come from trees which were once living. Therefore, you can add it to your compost heap.
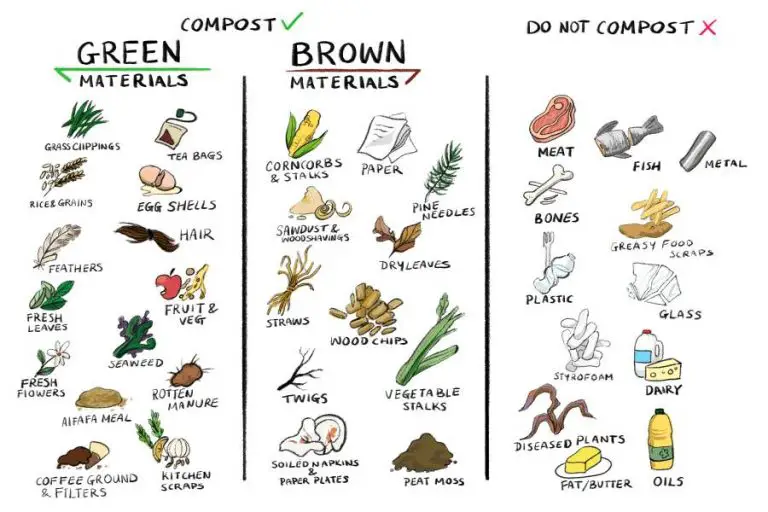
As you can see there are some exceptions to the ‘has it been alive’ rule. It’s not that these things can’t be composted, but they complicate the process quite a bit.
For example, meat and fish are prone to attracting pests and rodents so are best avoided for your average backyard composter.
Basically, they’re more hassle than they’re worth.
Another exception is carnivorous pet poop or human poop. This can be composted, you can even get special toilets to compost your poop, but they need particular conditions to ensure no harmful bacteria survive. You also need to be selective about how you use the resultant compost.
A final note – with things like tea bags you need to be extra careful. While most are compostable, there will be some that contain plastic so make sure to check if you’re not sure.
Types of composting
There are a few different types of composting. But which ones best for you?
They all follow the same general principles of mixing stuff together in the correct ratios to form compost. However, they differ in what’s used to hold the compost.
The methods described below are only suitable for outdoor composting. If you want to learn about indoor composting skip to the end of the article where I’ve discussed the different options.
Open composting
This is the most rustic composting style.
Open piles are great for people with a lot of yard waste because there’s no real limit to the size of your pile. You simply gather all your materials into a heap and get going.
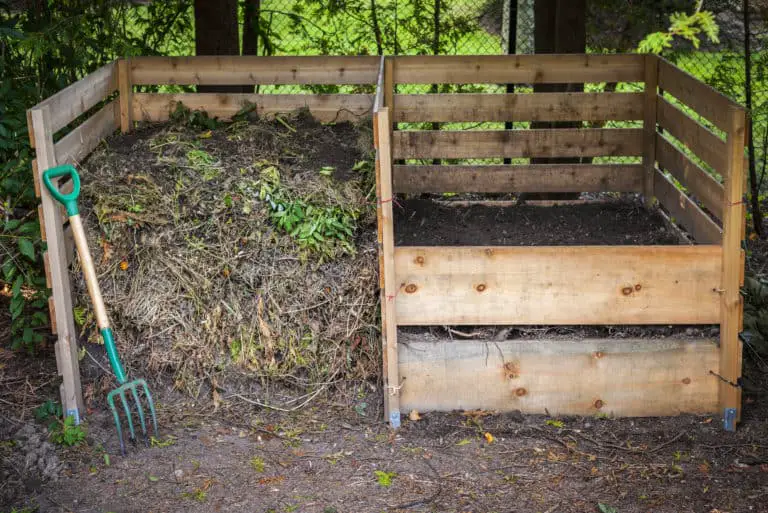
Most people chose to have some sort of walls around their open heaps for aesthetic reasons and to ward off rodents. Wire mesh or wooden pallets are two popular options.
I also like to cover our piles with tarp to protect them from the rain.
With open piles, you can pick between two methods of composting: hot or cold.
Hot composting requires a BIG pile (at least 3x3x3 feet at all times, bigger if you live in a colder climate), plus some maintenance such as regular turning and monitoring of the conditions. But will produce compost quickly, and kills any weed seeds that may have snuck in.
For most backyard composters, hot composting will be hard to achieve and you’ll end up cold composting.
The cold method is easy. You build your pile with whatever you have and leave it. The disadvantage is you’ll be waiting longer for the compost.
Enclosed bin composting
This is a practical option for anyone who has a smaller backyard or lives in a residential area. Because the bins are enclosed, they won’t attract any pests or rodents.
The bins will also help to keep any bad smells inside the bin. Most bins are too small or not insulated enough for hot composting, so again the majority of people using bins will be cold composting.
There are a few different bin styles to pick from:
Stationary Bins
These can be thought of as upside-down bins. They’re open on the bottom so the compost can sit directly on the ground, but protected on the sides and the top.
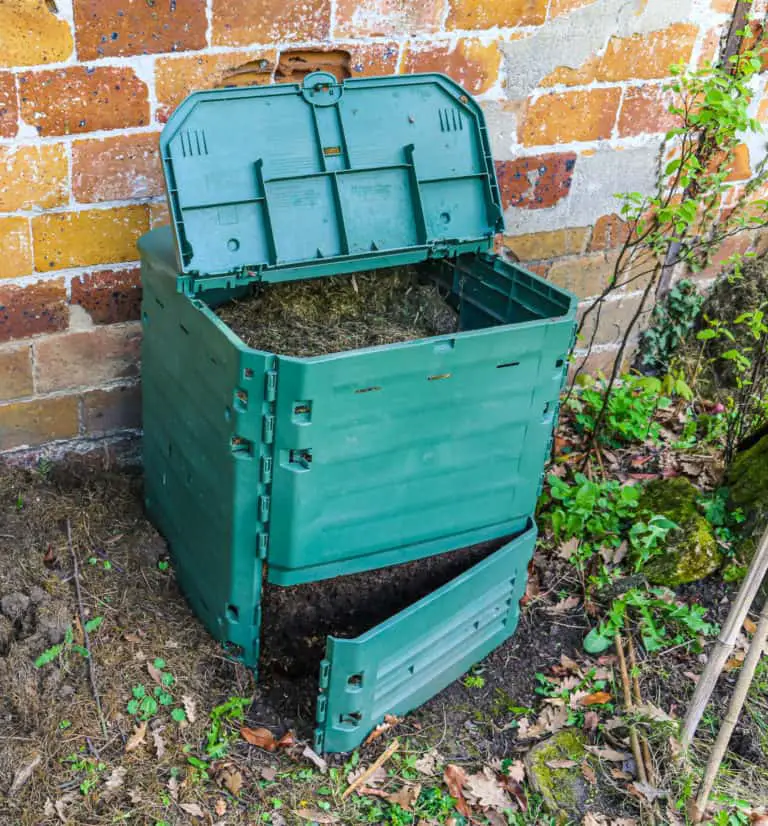
Stationary bins should be used in a continual fashion, where you constantly add new material to the top and harvest finished compost from the bottom.
They don’t require much work and give you a steady supply of fresh compost.
There’s normally no need to turn the compost in these bins (more on that later). However, if you notice a problem and need to turn the bin, you’ll have to mix all the compost together regardless of what stage it’s at.
Rotating Bins
Otherwise known as compost tumblers. Looking for no-hassle, quick compost?
These are the bins for you.
You fill the bin with your materials and then leave them to decompose. It’s easy to turn the container every few days, and most come with aeration holes and spikes on the inside to help with mixing.
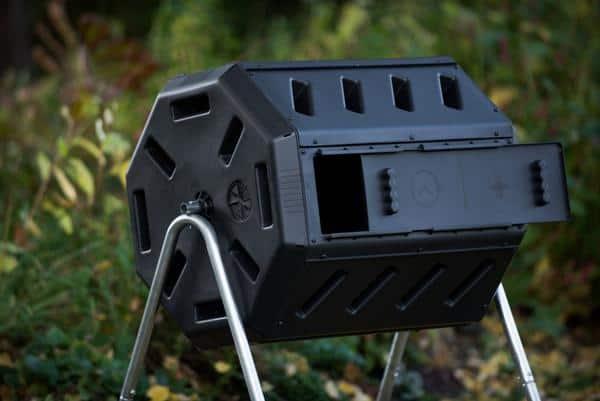
The bins can come well insulated so will reach high temperatures, even in colder climates. Combine this with regular turning, and an experienced composter will have their compost ready in no time.
One potential downside is that you can’t continuously add material to the bin, once it’s full you need to wait for it to compost. However, many have two chambers so you can have two batches of compost on the go.
DIY Bins
If you have an old trash can lying around, then why not try up-cycling it into a compost bin? Drill some aeration holes into the sides, and it’s good to go.
How to compost: six easy steps
Now for the juicy bit.
I’ve outlined six easy-to-follow steps that get you from collecting your materials to having finished compost.
Decide where to put the compost bin
The two most important things to consider here are:
- is it close enough to my kitchen that I’m going to use it?
- is it close enough to a water source so I can easily add water when I need to?
If the answer to both of these is yes, then you’ve picked a good spot.
Some other common questions I get asked are:
Should I keep my compost in the sun or the shade?
The short answer is it doesn’t really matter. Compost heats up due to the chemical reactions going in INSIDE the compost. Outside heat is a very small factor.
The long answer:
If you live somewhere very sunny, then your compost bin is probably better off in the shade to stop it from drying out too quickly. Excessive wind can also dry out open piles, so try and put them somewhere sheltered.
Conversely, if you live somewhere colder, then the compost would be better off placed in a sunny spot where it can get some heat. But the main thing to worry about here is to make sure your pile is well insulated so the heat from inside the compost can’t escape.
Another thing to consider is how much it rains. You don’t want to expose the compost to too much rain, or it’ll become soggy.
Of course, if you’re using a covered bin, the rain isn’t going to be an issue.
What surface should I put the bin on?
If you’re using a composting container with an open bottom, the best place for it is on top of a patch of soil. This will help with drainage and also let the worms come in and work on your compost.
I don’t suggest keeping open bottom containers on concrete or decking. If this is your only option, you’ll be far better off with a closed bin.
Also, try and avoid placing your compost too close to nearby trees. By doing so you risk a tree rooting in the compost.
How big should my compost heap be?
A bigger pile is usually always better. Larger piles retain more heat so will compost faster.
For hot composting the pile needs to be at least 3x3x3 at all times. This will ensure you have enough insulating material to keep the middle of the pile warm.
But don’t worry if you don’t have this much material (most home composters won’t), just make the pile as big as you can. If you have a compost bin it will work best when it’s completely full, but again don’t worry too much if you can’t fill it.
Composting small amounts is better than composting nothing!
Can I compost all year round?
Technically yes, but it will be a lot slower in the winter and requires quite a bit of work. For the average composter, their pile will become dormant over winter.
If you want to continue composting throughout the winter, I recommend getting an insulated bin.
I have a guide to the best compost bins for winter if you want more information.
Also, keep in mind how readily available the materials you need are. You may find there’s a shortage of brown materials like dry leaves in the summer. I tend to start stashing these sorts of materials at the end of winter to make sure I have a steady supply later on.
Prepare the scraps
Before you put anything into your compost heap make sure it’s not too large. The more surface area something has, the longer it will take to decompose.
A good tip, especially for shredding leaves, is to run things over with your lawnmower. Or, if you have a lot of stuff to shred, you could invest in a mulcher.
Also, don’t go too overboard and turn everything to mush. Again, it’s about balance. If you shred everything too small it will create an impenetrable glob of materials and reduce the surface area available instead of increasing it.
With both brown and green material, you should aim to diversify the size of your scraps. Smaller pieces will decompose quicker and bigger chunks will help keep the mixture loose so air and water can move through it.
Build the perfect compost pile
Once you have your scraps, it’s time to start building.
I like to use the lasagne method.
Building the pile in layers has three benefits:
- minimises maintenance because it ensures the pile is well mixed
- makes it easy to bury the food scraps and deter pests
- enables control over the brown:green ratio
As a guideline, you should aim for a ratio of around 2:1 browns to greens. However, this is a very rough estimate and almost impossible to stick to.
For every handful of greens you put it, add a handful of browns. If your pile seems dry start adding a few more greens (or less browns), and do the opposite if the pile becomes too wet.
You might have to experiment a bit before you find a ratio that works for you.
Note if you’re using a rotating bin then there’s no need to layer. But the required ratios are the same.
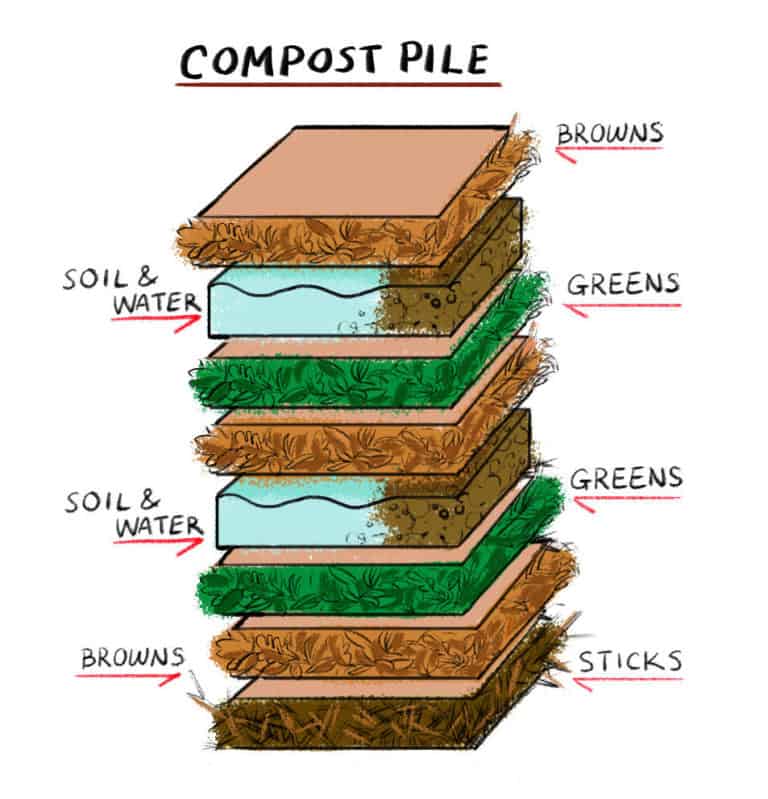
First layer
Your bottom layer should be a loose layer of a stalky material like twigs or branches. The purpose of this layer is to let oxygen flow through into the bottom of your pile, so it should be strong enough not to compact too much under the weight of the compost.
You can also use a wooden pallet if you have one handy.
Second layer
Next, you want to add a layer of brown organic material.
Don’t worry if you don’t have enough of one material to build the whole pile. It’s fine to use a mixture.
Using a variety of elements is actually a good thing because each one introduces different nutrients to the finished product.
Third layer
On top of the brown layer, add the green materials.
Try not to let these touch the edges, especially food scraps because these will attract pests. The closer they are to the side of your pile, the better the pests will be able to smell them.
As with the dry materials, try not to add too much of one thing. For example, if you add a thick layer of grass clippings, they’ll all clump together and stop air from flowing.
Fourth layer
This is an optional layer.
If you think the pile is in danger of being too dry, you can add some water in at this stage.
This will depend on how wet your materials are. If you have a lot of ‘wet’ things like fruit and vegetables, you probably don’t need extra water. But if you have more dry materials like rice and grains, then a bit of water could be a good idea.
Another thing I like to add now is some already finished compost or garden soil. These materials contain some of the microorganisms that your compost will need, adding them will help give your compost a kick start.
Repeat steps 1-5
Keep layering your pile up until you’ve got no more materials left: brown, green, brown, green, brown…
Final layer
On top, you always want a generous layer of brown stuff.
If you’re using the continuous composting method, then you can keep adding layers as and when you need. Just make sure you always cover any food scraps with some brown material.
Watch and wait
Finished building your pile and wondering what’s next?
It’s time to be patient. The composting process isn’t fast.
There are ways to speed it up, such as hot composting. If you need your compost quickly, or you’re just getting sick of waiting you can check out our guide on heating up compost.
Check-in on your compost at least once a week to see how it’s progressing, if it looks like it’s not doing much or it’s starting to smell then it’s time to take action. Often, it’ll just need a turn or some water
I’ve discussed different problems and their solutions later on in the article.
Turning
A dilemma lots of composters face is whether they should turn their compost pile or not.
Turning is the same as mixing. It helps to aerate the pile (add oxygen) and bring materials that were at the edge of the pile into the middle, which speeds up the overall process.
But it can be a lot of effort, especially if you have a large pile.
It’s also possible to turn the pile too much. As you turn the pile heat from the middle of the pile will escape. If you cool the pile down too much the process will become sluggish and it can take a while for the compost to get back up to temperature.
If you’re not in a hurry to have finished compost, I wouldn’t worry about turning too often.
It’s not really necessary, especially for a backyard composter. Once every few weeks should be sufficient.
If you are in a hurry you could opt for a compost tumbler. These make turning the compost a doddle.
An alternative to turning I’ve been recommended is to put perforated plastic tubes in your compost bin. The holes help air circulate throughout the pile so negates the need for any mixing.
Note: if you have a continuous composter, then don’t turn your pile (or only turn the top half of it). Turning would mess up the order of the bin. You would move your finished compost to the middle of the pile where you wouldn’t be able to access it.
Time to use the compost
It can be hard to know when your compost is finished.
How long it takes will depend on a lot of factors such as the size of your pile, the materials you used and the climate you live in.
The maximum you should be waiting is around a year. But if you do things to speed the process up, then you could have compost in 2-3 months.
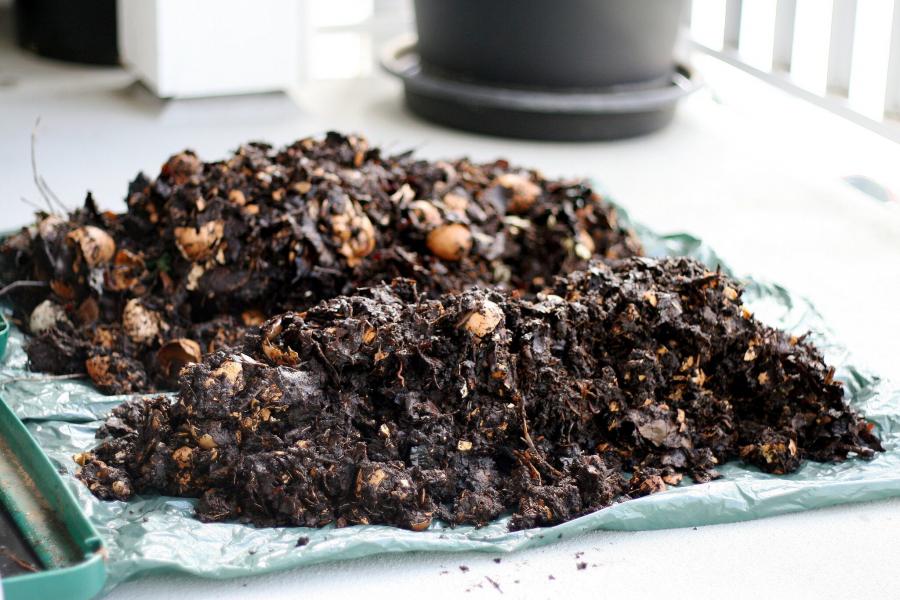
You’ll know when the compost is ready mainly by its smell and texture.
- it should be dark brown, crumbly and smell like earth.
- it should be earth temperature
- most of the original organic materials you used shouldn’t be visible
- the amount of material should have shrunk by around half
If in doubt, the best thing to do is leave the compost for another few weeks before you use it.
Depending on what you added to your compost and how much you chopped it up, you might still be able to make out a few things even when compost is finished. For example, egg shells, avocado pips or larger wood chips take a lot longer to break down than a chopped up apple. If you want to know how to compost wood chips faster, check out our guide.
To get rid of these you need do what’s called screening the compost. You put the compost through a giant sieve to remove the larger pieces.
You can make a homemade compost sifter using a cardboard box or a wheelbarrow with some wire mesh over the top.
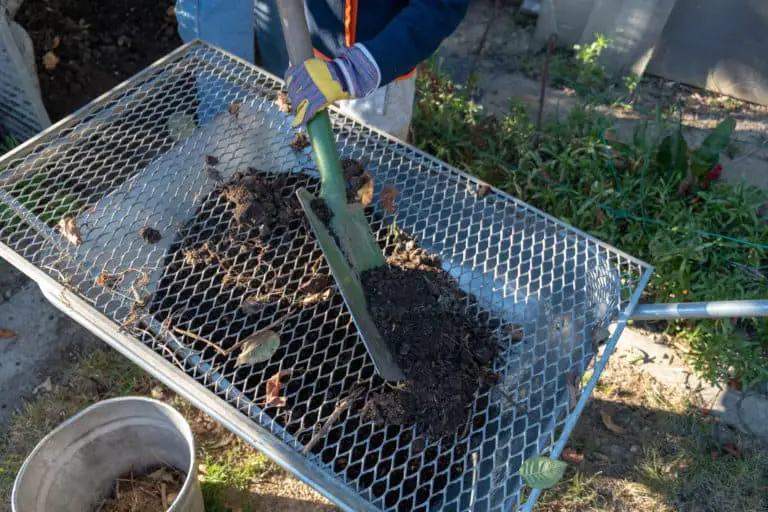
Once you’ve collected all the chunky bits, you can add these things back into your next batch of compost. After a few rounds, even the most stubborn materials will break down. Furthermore, they have the added benefit of already containing some of those vital microorganisms the compost needs.
Once you’ve screened the compost, you can start using it in your garden. Yay!
Common Problems and How To Fix Them
| Problem | Diagnosis | Answer |
|---|---|---|
| My Compost Smells | Your compost is either too wet or too compacted and not getting enough oxygen | Add in some dry materials and turn to mix and aerate. Adding coarse materials like dry leaves will help loosen up the pile |
| My compost is too dry / not progressing | You’ve added too much brown material | Water your pile while turning it. You can also add a compost activator like rotten manure to boost activity |
| My compost is too wet | Your pile can’t drain efficiently or has too many wet materials | Add in moisture absorbing materials like sawdust and turn the pile to fluff it up and help drainage |
| My compost is attracting pests or rodents | You’ve not covered food scraps efficiently enough, or have added meat/fish to the pile | Add an extra layer of an insulator like straw around the pile to stop smells from escaping |
| My compost heap is steaming | Hot compost can be a good thing, but it can also get too hot | Measure the temperature of your pile with a compost thermometer. If it’s over 150 Fahrenheit turn the pile to help cool it down |
| My compost is growing weeds | You’ve added seeds to the pile (or they’ve been blown in) and the compost didn’t get hot enough to kill them | Add in more nitrogen-rich elements to the compost and turn regularly to help it maintain a high temperature |
Apartment composting
Home composting is becoming more and more common.
We take a look at two of the more popular methods, one that uses worms and one way to compost in an apartment without worms.
Worm Composting
Otherwise known as vermicomposting, this method uses worms to do most of the hard work. No more cumbersome turning hooray!

Worms eat the scraps you throw away and then poop it out again in the form of compost. Strange right?
Worm composting is perfect for indoor composting because it’s odorless. It’s also pretty fast. Once you’ve built up your worm colony, you can have finished compost in as little as a month.
To get started you’ll need a worm bin and some red worms. I have a different article covering the basics of worm farming as well as the best worm bins if it’s something you’re interested in.
Vermicompost is a high-quality compost that’s is great to use in a worm tea recipe.
Bokashi / Food Recycling
Bokashi means ‘fermented organic matter’ in Japanese. It’s another small scale system that can be done indoors.
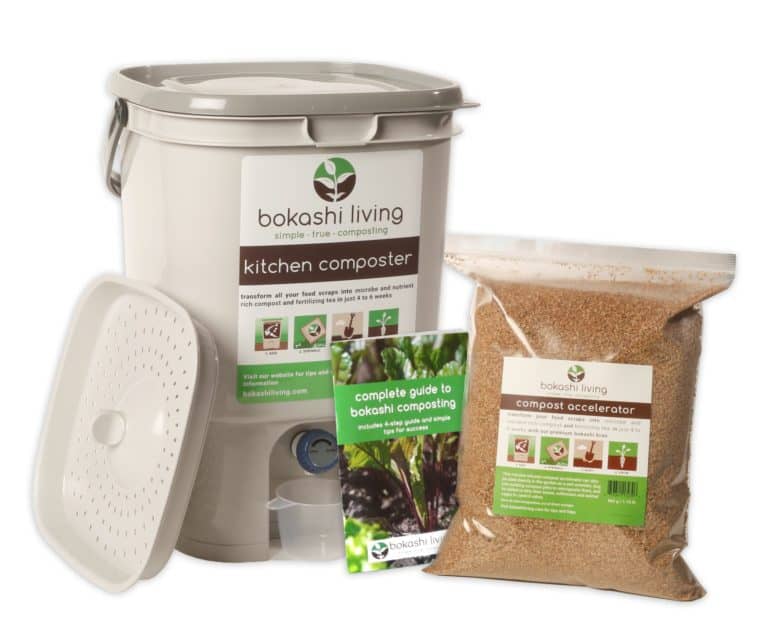
A significant advantage for Bokashi is that it can deal with meat scraps and dairy products without attracting pests. Plus it will produce ‘compost’ in a matter of weeks.
Compost is in inverted commas because it’s more of a fermenting process and doesn’t produce finished compost. You need somewhere to bury the fermented scraps, which isn’t all that practical if you don’t have a garden.
You can add it to the worm composters I talked about above, but only in limited quantities because it’s quite acidic.
An even faster way to create this kind of semi-compost is to get a food recycler.
Want to learn more? Take a look at our guide to the best bokashi bins.
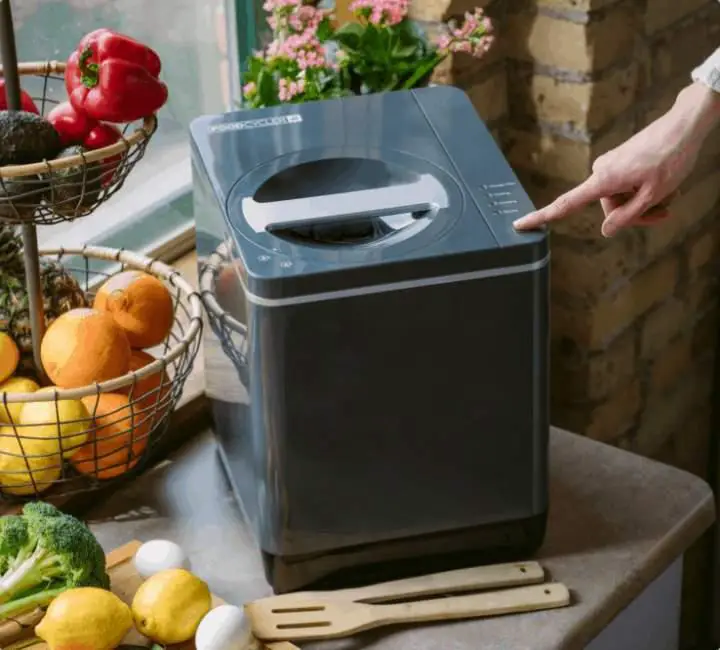
This ingenious machine breaks down food scraps (inc. meat and dairy) into micro-sized particles that are ready to be buried in your garden within 3 hours.
All you need to do is press a button. Crazy right?
Summary
There are no exact rules with composting, just a few guidelines to make things a bit quicker.
In truth, any compost pile will breakdown given enough time, so don’t overthink it too much.
The best thing to do is get practising and eventually you’ll find your brown thumb.
Happy composting!